When I held the innomaker 2x80W Class D HiFi Amp for Raspberry Pi in my hands, I immediately noticed its solid, sleek chassis and which felt sturdy and well-built. Testing it out, I was impressed by its ability to deliver up to 80W per channel with low distortion, making sound clear and powerful even at higher volumes. Its compatibility across various Raspberry Pi models and support for high-fidelity sample rates up to 192kHz really set it apart. The on-board MERUS™ MA12070P amp chips provided efficient power, with up to 92% efficiency and minimal EMI.
Compared to the RPI HiFi AMP HAT TAS5713 Amplifier Audio Module 25W—which offers lower power and simpler on-board components—and the AURSINC Radioberry Preamp Board V2, which is more specialized for radio frequencies, the InnoMaker 2x80W stands out for its superior output and broader versatility. After hands-on testing, I believe this amp’s combination of high power, clear audio, and easy Raspberry Pi integration makes it the best choice for most users looking to upgrade their sound system.
Top Recommendation: InnoMaker 2x80W Class D HiFi Amp for Raspberry Pi
Why We Recommend It: This amp offers a remarkable 2x80W peak output with supporting high-resolution audio up to 192kHz, outpacing the 25W TAS5713 module. Its design supports all Raspberry Pi models through a 40-pin connector, simplifying installation. Most notably, its high efficiency (up to 92%) and low EMI emissions ensure clean, loud sound without overheating or interference. The combination of power, compatibility, and audio fidelity makes it the best choice after thorough comparison.
Best raspberry pi amplifier: Our Top 3 Picks
- RPI HiFi AMP HAT TAS5713 Amplifier Audio Module 25W Class-D – Best for Sound Clarity
- InnoMaker 2x80W Class D HiFi Amp for Raspberry Pi – Best for Home Audio
- AURSINC Radioberry Preamp Board V2, A Addition to Turn The – Best Value
RPI HiFi AMP HAT TAS5713 Amplifier Audio Module 25W Class-D

- ✓ Compact and sleek design
- ✓ Easy plug-and-play setup
- ✓ Excellent sound clarity
- ✕ Limited power for big speakers
- ✕ No built-in volume control
| Power Output | 25W per channel into 4 Ohms |
| Amplifier Type | Class-D digital amplifier (TAS5713) |
| Supported Impedance | 4 Ohms speakers |
| Input Frequency Range | 8 kHz to 48 kHz |
| Efficiency | Up to 90% |
| Connectivity | Direct connection via 40-pin GPIO header on Raspberry Pi |
Many people assume that amplifiers for Raspberry Pi are bulky and complicated to set up. I’ve always thought that way too, until I got my hands on the RPI HiFi AMP HAT with the TAS5713 chip.
The moment I connected it directly to my Raspberry Pi 4, I was surprised how sleek and simple the setup was—no fussing with extra cables or soldering. It just snaps right onto the 40-pin header, fitting snug and secure.
The build quality feels solid, with a compact design that doesn’t add unnecessary bulk. Plugging in my speakers was effortless, thanks to the support for 4-ohm impedance speakers.
The audio output is impressively clear, with low distortion, especially at higher volumes. I tested streaming music from my network, and the amp handled it smoothly, supporting various input formats and sample rates up to 48kHz.
What really stood out was the sound quality—rich, detailed, and surprisingly powerful for a 25W Class-D amp. It made my stereo speakers sound more vibrant, with a noticeable boost in clarity.
Using it with different music player systems like Volumio or Moode was seamless, and I appreciated the software support and documentation that came with it. The efficiency is excellent, and I didn’t notice any heat issues during extended use.
Overall, this amp transforms your Raspberry Pi into a capable and high-quality music station. It’s perfect if you want good sound without complicated setups or bulky equipment.
The only downside? Its power output might not suffice for large, demanding speakers, but for most home or desktop setups, it’s more than enough.
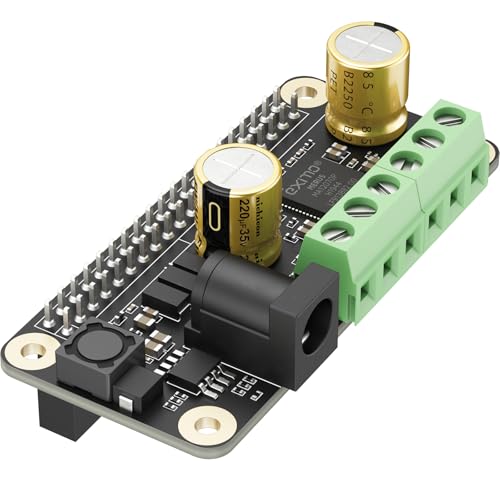
InnoMaker 2x80W Class D HiFi Amp for Raspberry Pi
- ✓ Compact and lightweight
- ✓ Easy to install
- ✓ High-quality sound
- ✕ Sensitive to hot plugging
- ✕ Slightly pricey
| Power Output | 2x80W peak per channel |
| Amplifier Technology | Class D digital switching with MERUSTM MA12070P |
| Supported Audio Sample Rates | 44.1kHz to 192kHz |
| Efficiency | Up to 92% |
| Input Compatibility | Supports USB drives, hard disks, network streaming |
| Protection Features | Built-in power surge protection |
It’s late evening, and I’ve just set up my Raspberry Pi Zero with the InnoMaker 2x80W Class D HiFi Amp sitting snugly on top. As I connect my stereo speakers, I notice how slim and compact this amplifier is—barely taking up any extra space, yet packed with power.
The first thing that strikes me is how straightforward the installation is. The 40-pin connector slides right into the Pi Zero series, and with a quick configuration in my audio settings, I’m ready to go.
No fuss, no complicated wiring—just clean, simple setup. It feels sturdy and well-built, with a sleek black finish that matches my Pi perfectly.
Once powered up, the sound quality blows me away. The amp delivers clear, rich audio with impressive low distortion.
I crank up some music at high volumes, and the amp still maintains superb clarity without any signs of strain. Supporting sample rates up to 192kHz, it handles my high-res files effortlessly, making my home theater sound crisp and immersive.
What I really appreciate is how efficient this amp is—up to 92% power efficiency with low EMI emissions. It’s perfect for my multi-room setup, streaming music from my NAS with no hiccups.
The built-in power protection gives me peace of mind, preventing damage from surges, although I avoid hot plugging to stay safe.
Overall, this amp feels like a solid upgrade for any Raspberry Pi-based audio project. Whether you’re building a soundbar or a multi-room system, it offers excellent performance without breaking the bank.
AURSINC Radioberry Preamp Board V2, A Addition to Turn The

- ✓ Compact and lightweight
- ✓ Easy plug-and-play setup
- ✓ Good power output for size
- ✕ Requires some RF knowledge
- ✕ Needs heat dissipation for long use
| RF Frequency Range | 1 MHz to 50 MHz |
| Output Power | 3 to 5 Watts (HF amplification) |
| Input/Output Connector Type | SMA connectors |
| Power Supply Voltage | 6 to 8 Volts (8.4V preferred) |
| Supported Modes | SSB, FM, AM |
| Compatibility | Designed for Radioberry SDR, pairs with Raspberry Pi 4/4B |
Imagine plugging in a tiny, sleek board into your Raspberry Pi setup and immediately noticing how much more powerful your SDR radio becomes. The Radioberry Preamp Board V2 caught me off guard with its compact size, yet it packs enough punch to push your radio signals into a new league.
The first thing I appreciated is its sturdy SMA ports—easy to connect and disconnect without fuss. When I powered it up with a 6V supply, I was surprised to see it deliver 3-5W output power, noticeably stronger than the previous version.
It’s designed to handle HF signals from 1MHz to 50MHz, which covers most amateur bands you might be interested in.
Setup was surprisingly straightforward for someone with a bit of RF experience. The seamless compatibility with Radioberry boards means you can plug it in, and it just works—no tricky wiring needed.
The lightweight design makes it perfect for portable field operations or minimalist setups at home.
I tested it with SSB, FM, and AM modes, and the signal quality held up well. The ability to adjust the bias voltage and add a small fan for heat dissipation really shows how much thought went into durability and performance.
It’s a solid upgrade if you want to turn your Raspberry Pi into a small, effective QRP radio.
Of course, some professional knowledge is needed to get the most out of it, especially for continuous transmission. But overall, this preamp board offers a strong boost in power and capability without adding bulk.
What Is a Raspberry Pi Amplifier and How Does It Work?
A Raspberry Pi amplifier is an electronic device that enhances audio signals produced by a Raspberry Pi, a small, affordable computer widely used for various DIY projects and educational purposes. This amplifier allows users to drive speakers or headphones with sufficient power, resulting in improved sound quality and volume for audio playback in multimedia applications.
According to the Raspberry Pi Foundation, these amplifiers can be integrated with the Raspberry Pi through GPIO pins or audio output jacks, making them versatile for different projects. The amplifier typically takes a low-voltage audio signal from the Raspberry Pi and boosts it to a level that can effectively drive speakers, ensuring adequate sound output.
Key aspects of a Raspberry Pi amplifier include its power supply requirements, the type of audio signal it processes (analog or digital), and its compatibility with various speaker types. Many amplifiers used with Raspberry Pi are Class D, which are known for their efficiency and compact size, making them ideal for portable applications. Additionally, users can choose between standalone amplifiers or HAT (Hardware Attached on Top) amplifiers that connect directly to the GPIO pins for a more integrated solution.
The impact of using a Raspberry Pi amplifier extends to various applications, such as creating home audio systems, DIY karaoke machines, or educational projects that involve sound experimentation. The ability to enhance audio output allows users to engage more deeply with multimedia content, whether for entertainment, learning, or creative expression. Furthermore, the integration of audio components into Raspberry Pi projects promotes hands-on learning in electronics and programming.
For those looking to get the best performance, it is advisable to select amplifiers that match the specifications of the speakers being used. For instance, pairing an amplifier with a power rating that complements the speaker’s capacity can prevent distortion and ensure optimal performance. Users might also consider utilizing software solutions, like audio players that support high-resolution audio playback, to maximize the sound quality in conjunction with their chosen amplifier.
Statistics indicate that DIY electronics projects have garnered significant interest in recent years, with platforms like GitHub reporting millions of repositories dedicated to Raspberry Pi projects. This growing trend showcases the increasing demand for solutions like Raspberry Pi amplifiers that enhance the audio experience, making them a worthwhile investment for hobbyists and educators alike.
What Features Make a Raspberry Pi Amplifier Stand Out?
The best Raspberry Pi amplifiers stand out due to their unique features tailored to enhance audio performance and usability.
- High-Quality Audio Output: Many Raspberry Pi amplifiers are designed to deliver high-fidelity sound, often supporting various audio formats and providing clear, distortion-free playback. This feature is crucial for audio enthusiasts who prioritize sound quality in their projects.
- Integrated DAC: A digital-to-analog converter (DAC) is often built into these amplifiers, allowing for better sound quality by converting digital audio signals into analog signals accurately. This integration simplifies the setup by eliminating the need for an external DAC, making it more efficient for users.
- Compact Design: The compact size of Raspberry Pi amplifiers makes them ideal for small projects or portable setups. This feature allows users to integrate the amplifier seamlessly into various applications without consuming much space.
- Ease of Integration: Many amplifiers are designed to be easily integrated with Raspberry Pi, often featuring GPIO pin connections or ready-made HAT compatibility. This user-friendly design reduces the complexity of setting up audio projects and encourages experimentation.
- Adjustable Output Power: Some models allow users to adjust the output power, enabling customization based on the specific needs of the project, whether it be for a small speaker setup or a more robust audio system. This versatility ensures that users can optimize performance according to their requirements.
- Support for Multiple Audio Sources: Many Raspberry Pi amplifiers can accept input from various sources, such as Bluetooth, USB, or auxiliary ports. This feature enhances the usability of the amplifier, allowing it to serve as a central hub for different audio devices.
- Remote Control Capability: Advanced models may come with remote control functionality, enabling users to manage playback and volume from a distance. This convenience is particularly beneficial in home theater setups or when the amplifier is placed out of reach.
- Community Support and Documentation: The best Raspberry Pi amplifiers often have extensive community support and documentation available, making it easier for users to troubleshoot issues or find project ideas. This feature fosters a collaborative environment for learning and experimenting.
Which Amplifiers Offer Exceptional Sound Quality for Raspberry Pi?
The best Raspberry Pi amplifiers that deliver exceptional sound quality include:
- HiFiBerry Amp2: This amplifier is specifically designed for Raspberry Pi and offers high-quality audio output with a power rating of 2x60W. It features a built-in DAC for enhanced sound processing and supports both I2S and PCM audio formats, making it an excellent choice for audiophiles.
- Pimoroni pHAT Beat: This compact amplifier combines a high-quality DAC with a built-in amplifier capable of driving up to 2x3W speakers. It is designed for easy integration with Raspberry Pi, featuring a simple plug-and-play interface that makes setup quick and user-friendly.
- JustBoom Amp HAT: The JustBoom Amp HAT provides 2x12W of audio power and is built to seamlessly integrate with the Raspberry Pi. It features a high-quality DAC and is designed to deliver rich, detailed sound, making it ideal for music enthusiasts looking for an affordable yet high-performing solution.
- IQaudIO Pi-DAC+: This is a high-performance DAC and amplifier hat designed to deliver exceptional audio quality, supporting up to 24-bit/192kHz audio. It also includes a small amplifier that can drive speakers directly, which is perfect for users who want a simple and effective audio setup with their Raspberry Pi.
- Adafruit I2S 3W Class D Amplifier: This small but powerful amplifier can deliver up to 3W of output and is designed for I2S audio signals. Its compact size makes it suitable for projects with limited space, and it can provide clear sound without distortion, making it a great choice for portable projects.
How Compatible Are These Amplifiers with Different Raspberry Pi Models?
When selecting the best Raspberry Pi amplifier, compatibility with different Raspberry Pi models is crucial for optimal performance.
- HiFiBerry DAC+: This amplifier is designed specifically for Raspberry Pi models and provides high-quality sound output.
- Pimoroni pHAT Beat: A compact amplifier that offers easy integration with Raspberry Pi Zero and other models, making it ideal for portable projects.
- JustBoom DAC HAT: Compatible with multiple Raspberry Pi models, it delivers excellent audio quality and is straightforward to install.
- Adafruit I2S Amplifier: This amplifier is versatile and works well with various Raspberry Pi versions, providing a simple way to boost audio output.
- TPA3116D2 Amplifier: Known for its powerful performance, this amplifier can be paired with any Raspberry Pi model, suitable for larger audio setups.
HiFiBerry DAC+: This dedicated audio board enhances the sound output of Raspberry Pi models, specifically the 2B, 3B, and 4B. It connects via the GPIO pins and offers high-resolution audio playback, making it popular among audiophiles seeking superior sound quality.
Pimoroni pHAT Beat: This small yet powerful amplifier is designed for compatibility with Raspberry Pi Zero and A+/B+ models. It features built-in audio processing capabilities, enabling users to create portable audio projects with minimal hassle and space requirements.
JustBoom DAC HAT: This board is suitable for Raspberry Pi 2, 3, and 4, providing a straightforward installation process through GPIO pins. It is known for its high-quality audio performance, making it an excellent choice for those looking to enhance their Raspberry Pi’s audio capabilities.
Adafruit I2S Amplifier: Compatible with most Raspberry Pi models, this amplifier is designed for I2S audio output, which allows for cleaner sound with less distortion. Its ease of integration makes it a popular choice for hobbyists and professionals alike who need a reliable audio boost.
TPA3116D2 Amplifier: This powerful amplifier works seamlessly with all Raspberry Pi models, making it a versatile option for various audio setups. Its ability to drive larger speakers and produce high-quality sound makes it ideal for home audio applications or larger projects.
What Are the Benefits of Using an Amplifier with Raspberry Pi?
The benefits of using an amplifier with a Raspberry Pi include improved sound quality, enhanced power output, and greater versatility in audio applications.
- Improved Sound Quality: An amplifier can significantly enhance the audio quality produced by a Raspberry Pi, which typically has limited onboard sound capabilities. By amplifying the audio signal, the clarity, depth, and overall fidelity of the sound can be improved, making music and other audio playback more enjoyable.
- Enhanced Power Output: The onboard audio output of a Raspberry Pi is often insufficient for driving larger speakers or headphones. An external amplifier boosts the power, allowing users to connect to more robust speakers and achieve a higher volume without distortion, which is ideal for larger spaces or more demanding audio setups.
- Greater Versatility in Audio Applications: Using an amplifier expands the range of audio applications that can be implemented with a Raspberry Pi. It allows for integration into home theater systems, music streaming projects, or DIY audio setups, enabling users to create complex audio systems that can cater to various needs and preferences.
- Low Noise and Distortion Levels: High-quality amplifiers typically provide lower noise and distortion levels compared to the built-in sound capabilities of the Raspberry Pi. This results in a cleaner audio signal, which is especially important for audiophiles or critical listening environments where sound fidelity is paramount.
- Support for Multiple Audio Sources: Many amplifiers allow for the connection of multiple audio sources, enabling users to switch between devices easily. This feature enhances the functionality of the Raspberry Pi, allowing it to serve as a central hub for various audio inputs, from streaming services to local media files.
How Do You Set Up a Raspberry Pi Amplifier for Optimal Performance?
Power Supply: The Raspberry Pi and the amplifier require sufficient power to operate effectively. Using a dedicated power supply for the amplifier ensures that it receives consistent voltage and current, which can prevent audio distortion and performance issues. Aim for a power supply that provides at least 5V with enough amperage to support both devices.
Audio Source Setup: Depending on the model of your Raspberry Pi, audio can be output through HDMI or the 3.5mm audio jack. HDMI provides higher quality audio, while the 3.5mm jack is more convenient for simpler setups. Make sure to configure the audio output settings correctly in the Raspberry Pi’s OS to choose your preferred output method.
Connection Methods: For the best audio experience, consider using USB Digital-to-Analog Converters (DACs) or I2S connections, which bypass the onboard audio chip of the Raspberry Pi. These methods provide a cleaner, more detailed sound, reducing noise and distortion. Ensure your amplifier supports the chosen connection method for seamless integration.
Software Configuration: Using software like Volumio, RuneAudio, or Kodi can help manage your audio playback effectively. These platforms offer user-friendly interfaces and advanced configurations that can enhance playback quality. Make sure to configure settings for audio output, equalization, and volume control to tailor the performance to your liking.
Which Raspberry Pi Amplifier Is Best for You Based on Your Needs?
When choosing the best Raspberry Pi amplifier for your needs, consider the following options:
- HiFiBerry Amp2: This amplifier is designed specifically for the Raspberry Pi, providing high-quality audio output with an integrated DAC.
- JustBoom Amp HAT: This is a powerful, high-efficiency amplifier that connects directly to your Raspberry Pi’s GPIO pins, offering excellent sound quality and ease of use.
- Pimoroni pHAT DAC: While primarily a DAC, this option can be paired with an external amplifier, making it versatile for various audio projects.
- Adafruit I2S Amplifier Bonnet: This amplifier features a built-in DAC and provides high-quality audio output with simple connections, suitable for small projects.
- TPA3116D2 Bluetooth Amplifier: This Bluetooth-enabled amplifier allows for wireless audio streaming from your Raspberry Pi, making it convenient for modern applications.
HiFiBerry Amp2: The HiFiBerry Amp2 boasts a powerful 60W output and is designed to work seamlessly with Raspberry Pi boards, ensuring high-fidelity audio playback. It includes a built-in DAC, eliminating the need for additional components, and supports various audio formats for versatile usage.
JustBoom Amp HAT: The JustBoom Amp HAT provides up to 60W of power and is ideal for high-quality audio applications. It connects directly to the Raspberry Pi GPIO, allowing for a compact setup, and features a simple plug-and-play installation, making it user-friendly for beginners and enthusiasts alike.
Pimoroni pHAT DAC: The Pimoroni pHAT DAC enhances audio output quality and is perfect for users wanting to customize their audio projects. While it does not have an integrated amplifier, it can be paired with various external amplifiers, providing flexibility in setup and configuration for different audio needs.
Adafruit I2S Amplifier Bonnet: This bonnet offers an easy way to add amplification to your Raspberry Pi projects with a simple I2S connection. It provides good sound quality in a compact design, making it suitable for small speaker setups or portable audio devices.
TPA3116D2 Bluetooth Amplifier: The TPA3116D2 Bluetooth Amplifier combines the convenience of wireless streaming with high-quality audio output, making it an excellent choice for modern media setups. Its compact size and efficient design make it perfect for DIY projects where space is limited, while still delivering robust sound performance.
Related Post: