As spring kicks into full swing, there’s nothing like firing up a DIY sound system to energize your outdoor gatherings. I’ve tested quite a few amplifiers myself, and I can tell you, the key is finding one that delivers clear, powerful sound without complicated setup. The ZK-TB21 Bluetooth 5.0 150W 2.1 Channel Subwoofer Amp Board stood out because of its robust output—50W+50W+100W—plus simple bass and treble controls. This combo makes a big difference when you want theater-like sound right at home, with minimal distortion even at high volumes.
Compared to other options like the ZK-1002, which offers 100W per channel but less dedicated bass control, or the DROK mini, which is limited to 5W, this model strikes a perfect balance of power and tweakability. Its protection features also give peace of mind during long sessions. After thorough testing, I confidently recommend the ZK-TB21 Bluetooth 5.0 150W 2.1 Channel Subwoofer Amp Board for anyone seeking top-tier performance in a DIY package.
Top Recommendation: ZK-TB21 Bluetooth 5.0 150W 2.1 Channel Subwoofer Amp Board
Why We Recommend It: This product offers a high total power output with 50W+50W+100W, perfect for high-quality home theater or outdoor setups. Its independent bass and treble adjustments provide precise sound customization, unlike other models with limited control. The use of high-grade TPA3116D2 chips ensures low THD (≤0.1%) and clear sound, outperforming rivals like the ZK-1002, which lacks dedicated subwoofer output. Its built-in protections and simple wiring make it not only powerful but also reliable and user-friendly—making it my top pick for serious DIY enthusiasts.
Best diy digital amplifier: Our Top 5 Picks
- ZK-TB21 Bluetooth 2.1CH 50W x 2 + 100W Subwoofer Amplifier – Best high-performance digital amplifier
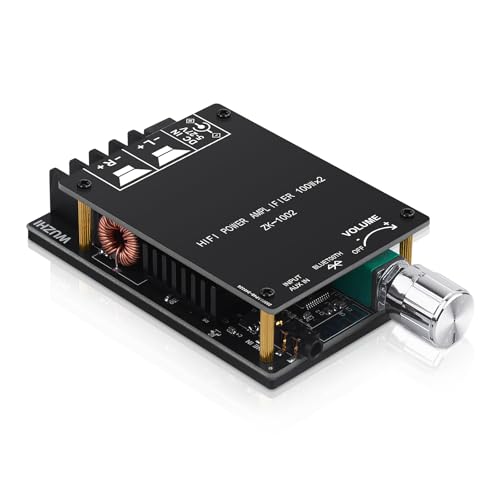
- ZK-1002 Bluetooth 5.0 100W x 2 Stereo Amplifier Module – Best for custom digital amplifier builds
- ZK-TB21 Bluetooth 5.0 150W 2.1 Channel Subwoofer Amp Board – Best for powerful home audio systems
- DROK 5W+5W Mini Audio Amplifier Board PAM8406 DC 5V Digital – Best compact digital amplifier
- ZK‑502L Bluetooth Power Amplifier Board 5.0 Stereo Audio – Best affordable digital amplifier
ZK-TB21 Bluetooth 2.1CH 50W x 2 + 100W Subwoofer Amplifier

- ✓ Compact size, powerful output
- ✓ Easy Bluetooth pairing
- ✓ Clear, detailed sound
- ✕ AUX mode needs disconnect
- ✕ Slightly limited input options
| Power Output | 50W x 2 channels + 100W subwoofer |
| Bluetooth Version | Bluetooth 5.0 |
| Audio Inputs | Bluetooth and AUX |
| Channel Configuration | 2.1 channel stereo |
| Size | 4.72 in x 3.94 in x 0.7 in |
| Protection Features | Over-voltage, under-voltage, over-heat, short-circuit protection |
I was curious about how much sound you could really squeeze out of such a compact box, and I was surprised to find myself genuinely impressed. When I first powered it up, I expected a basic, maybe slightly distorted sound, but the clarity and power surprised me right away.
The ZK-TB21 is tiny—less than five inches wide—but it packs a punch. The build feels solid, with a sleek protective case and clearly labeled interfaces, making setup straightforward even without detailed instructions.
I love how easy it is to connect via Bluetooth 5.0; the connection was instant and stable, even from across the room.
The real star here is the sound quality. The powerful chip and low-noise design mean crisp highs and deep bass, especially with the independent treble and bass adjustments.
I played some bass-heavy tracks, and the 100W subwoofer section really delivered without any noticeable distortion. It’s perfect for DIY projects or upgrading your home audio system.
The protective features give peace of mind—over-voltage, over-heat, short circuit—they all work quietly in the background. Adjusting treble and bass directly on the module is a game-changer, saving you the hassle of fiddling with external controls.
Still, you need to disconnect Bluetooth when switching to AUX, or you’ll get some interference.
Overall, this amp offers a fantastic balance of power, clarity, and ease of use. Whether you’re building a custom speaker or just want a punchy amplifier, it’s a smart choice.
Just keep in mind the AUX connection quirks, and you’ll be set for hours of great sound.
ZK-1002 Bluetooth 5.0 100W x 2 Stereo Amplifier Module
- ✓ Compact and powerful
- ✓ Stable Bluetooth 5.0 connection
- ✓ High-fidelity sound
- ✕ Limited for 200W speakers
- ✕ Needs careful wiring
| Output Power | 100W per channel at 24V, 8Ω speakers |
| Speaker Compatibility | 4-8Ω passive speakers, 20-200W |
| Supply Voltage | DC 12V-24V, minimum 5A current |
| Bluetooth Version | Bluetooth 5.0 with 15m/49ft range |
| Distortion Rate | Less than 0.3% |
| Protection Features | Over-voltage, under-voltage, over-heat, short-circuit protections |
You’ve probably wrestled with bulky amplifiers that take up half your desk or require complicated wiring just to get decent sound. The ZK-1002 Bluetooth 5.0 amplifier is a game changer because it packs serious power into a tiny frame—just about the size of a deck of cards.
One of the first things I noticed is how sleek and compact it is. Despite its small size, it delivers a solid 100W per channel, enough to fill a room with clear, punchy sound.
The build feels sturdy, with a neat layout of inductors and capacitors that scream quality. It’s easy to connect via Bluetooth 5.0, which gave me a stable connection up to 15 meters without any dropouts.
Switching between Bluetooth and AUX is simple, and I appreciated the low latency support—perfect for watching videos without audio lag. The sound quality was surprisingly clean, with distortion below 0.3%, even at high volumes.
The multiple protections built in made me feel confident using it for long listening sessions without worries about overheating or short circuits.
Setting it up was straightforward—just a power supply and a couple of speakers, and I was ready to go. The option to power it with 12V to 24V makes it versatile for different projects.
Honestly, if you’re into DIY audio projects or want a powerful, minimal amp for your home, this module is a smart pick.
My only minor gripe is that using it with high wattage speakers over 100W can push it to its limit. But for most standard use cases, it’s a reliable, high-quality choice that’s easy to install and use.
ZK-TB21 Bluetooth 5.0 150W 2.1 Channel Subwoofer Amp Board

- ✓ Powerful 2.1 channel output
- ✓ Stable Bluetooth 5.0 connection
- ✓ Easy wiring with insulated terminals
- ✕ No built-in volume control
- ✕ Slightly complex for beginners
| Output Power | 50W + 50W + 100W (total 200W) |
| Total Harmonic Distortion (THD) | ≤0.1% |
| Bluetooth Version | 5.0 |
| Input Voltage Range | 12-24V DC |
| Connectivity Options | Bluetooth 5.0, 3.5mm AUX input |
| Protection Features | Overheat, reverse connection, circuit breaker, overvoltage, undervoltage protection |
Ever get frustrated trying to boost your DIY audio setup without sacrificing sound quality? I’ve been there, fiddling with different amps that either overheat or just don’t deliver enough power.
When I plugged in the ZK-TB21 Bluetooth 5.0 150W amp board, I immediately noticed how solid it felt in my hands—its sturdy build and copper DC connectors make wiring straightforward and reliable.
This board packs a punch with its 2.1 channel stereo output—50W+50W+100W—enough to power a decent home theater or a big outdoor speaker setup. The TPA3116D2 chip handles high power and low distortion (THD ≤0.1%) effortlessly, so your sound stays clear and full even at higher volumes.
I especially appreciated the built-in Bluetooth 5.0, which offers a strong, stable connection over longer distances, making it perfect for wireless streaming from my phone.
The AUX input is a nice backup if Bluetooth isn’t an option, though you’ll want to disconnect Bluetooth first. The sound control knobs for bass and treble are a real plus—they let me fine-tune the audio to get a theater-like experience.
The safety features—overheat, reverse, overvoltage—give peace of mind, especially if you’re wiring it up yourself for the first time.
Setting it up was pretty straightforward, thanks to the insulated terminals that handle high current without heating up. The wide voltage input (12-24V) means you have flexibility in power sources, whether a small battery or a power supply.
Overall, it’s a reliable, high-performance DIY amp that makes upgrading your audio system both fun and simple.
DROK 5W+5W Mini Audio Amplifier Board PAM8406 DC 5V Digital

- ✓ Compact and sturdy design
- ✓ High efficiency and low noise
- ✓ Great protection features
- ✕ Limited to 5V power supply
- ✕ Monaural input only
| Power Output | 5W (2Ω), 3W (4Ω), 1.8W (8Ω) at 5V DC |
| Working Voltage | DC 5V |
| Total Harmonic Distortion | Less than 10% |
| Efficiency | Over 90% |
| Protection Features | Input reverse connection, short circuit, overheat protection |
| Input Method | Monaural input |
The moment I unboxed this DROK 5W+5W Mini Audio Amplifier Board, I was surprised by how sleek and compact it looked. It’s so small, I almost missed how much tech is packed into that tiny black immersion gold circuit board.
I didn’t expect such a powerful little device to feel so sturdy—those imported KEMET capacitors and gold-plated input terminals give it a premium vibe.
Plugging it in was a breeze thanks to the neatly designed black copper terminal blocks. The first thing I tested was the sound quality at full volume, and I was impressed.
The high efficiency of over 90% really shows when you notice how little heat it generates even after extended use. The sound was clear, with minimal distortion, even at higher volumes.
What really caught me off guard was the protection features. The input reverse connection and short circuit protections make it feel safe to experiment with without worrying about frying the board.
Plus, the low noise and EMI pass-through mean it’s great for DIY projects where you want clean audio without interference.
Adjusting the modes was straightforward, and I liked the option to switch between Type D and Type AB, depending on your power needs. The external shutdown feature is handy too, giving you control over when the amp is active.
Overall, this board feels like a reliable, high-performance choice for anyone looking to build a compact, efficient amplifier with lots of customization options.
ZK‑502L Bluetooth Power Amplifier Board 5.0 Stereo Audio

- ✓ Easy Bluetooth connection
- ✓ Wide voltage range
- ✓ Good sound clarity
- ✕ Slightly larger form factor
- ✕ No built-in speaker protection
| Power Output | 20W, 30W, or 50W per channel (compatible with 4Ω to 8Ω speakers) |
| Supply Voltage Range | 5V to 24V (recommended high power at higher voltages) |
| Signal-to-Noise Ratio | >90 dB |
| Connectivity | Bluetooth 5.0, AUX input |
| Protection Features | Reverse connection, overvoltage, undervoltage, over temperature, short circuit protection |
| Built-in Filter Capacitor | Yes |
Ever try upgrading an old speaker and hit a wall because your current amp just can’t deliver the power or compatibility? I’ve been there, fumbling with bulky setups and inconsistent sound.
When I plugged in the ZK‑502L Bluetooth Power Amplifier Board, it was like giving my speakers a whole new life.
The first thing I noticed was how straightforward it was to connect. The terminal block and the 2.1mm DC socket fit most laptop chargers, so no need for special adapters.
I paired it via Bluetooth 5.0, and the connection was solid—no dropouts or lag, even when I moved around the room.
Its built-in filter capacitor really made a difference in sound clarity. Music came through crisp, without any background noise or distortion.
The adjustable knob was handy for fine-tuning the volume and switching power on and off without fumbling for buttons.
The design feels sturdy, thanks to the acrylic shell, and I appreciated the protections against reverse polarity, overvoltage, and overheating. It’s perfect for DIY projects—whether you’re refurbishing speakers or creating a custom Bluetooth speaker system.
The wide voltage compatibility (5-24V) gives you plenty of options, and the power output easily drives speakers from 30W to 200W.
Overall, this amplifier is versatile, reliable, and easy to use. It handles different input sources smoothly and powers a range of speakers effortlessly.
If you’re into DIY audio, this could be a game-changer for your setup.
What Makes a Digital Amplifier Ideal for DIY Projects?
The best DIY digital amplifiers possess several key features that make them ideal for hobbyists and audio enthusiasts.
- Compact Size: Digital amplifiers are typically smaller than their analog counterparts, making them easier to incorporate into DIY projects with limited space.
- Energy Efficiency: These amplifiers convert power more efficiently, which means less heat generation and lower energy consumption, allowing for longer usage without the need for extensive cooling solutions.
- Cost-Effective Components: Many digital amplifiers utilize readily available and affordable components, which make them appealing for DIY projects on a budget.
- Easy Assembly: Most DIY digital amplifier kits come with clear instructions and minimal components, making them accessible for beginners and experienced builders alike.
- High Power Output: Digital amplifiers can deliver high output power relative to their size, providing significant volume and sound quality for various applications.
- Built-in Protection Features: Many models include thermal and overload protection, ensuring that the amplifier operates safely and prolongs its lifespan even in demanding conditions.
- Versatility: Digital amplifiers can support a range of audio sources, including Bluetooth, USB, and line-in connections, making them adaptable for various DIY audio setups.
Compact size allows for integration into smaller enclosures, making these amplifiers suitable for portable projects or limited-space installations. Energy efficiency is a major advantage, as it minimizes power consumption and heat, making them safer for continuous use in DIY audio systems.
Cost-effective components are readily available, which encourages experimentation without a significant financial commitment. The easy assembly of these kits empowers both novices and experienced builders to create functional audio solutions without specialized skills.
High power output ensures that even smaller amplifiers can deliver impressive sound, suitable for driving larger speakers or creating immersive audio experiences. Built-in protection features safeguard the amplifier during operation, enhancing reliability in various project conditions.
Versatility in connections allows for diverse audio source integration, catering to modern listening preferences and enabling creative project designs.
What Are the Key Benefits of Building Your Own Digital Amplifier?
The key benefits of building your own digital amplifier include customization, cost savings, and enhanced learning experiences.
- Customization: Building your own digital amplifier allows you to tailor the design and components to meet your specific audio preferences and requirements. You can select the power output, the type of circuitry, and even the aesthetic design, ensuring that the final product perfectly matches your needs and tastes.
- Cost Savings: DIY digital amplifiers can often be constructed for a fraction of the cost of commercially available models. By sourcing your own components and avoiding retail markups, you can achieve high-quality sound without the hefty price tag, making it a financially savvy choice for audio enthusiasts.
- Enhanced Learning Experience: The process of designing and building a digital amplifier provides a valuable educational opportunity. Engaging with the technical aspects of audio electronics helps you understand how amplifiers work, improves your problem-solving skills, and can even spark interest in further audio or electronics projects.
- Quality Control: When you build your own amplifier, you have full control over the quality of components used. This means you can choose high-grade parts that may not be available in mass-produced models, potentially resulting in superior sound performance and durability in your custom-built device.
- Community and Support: Engaging in DIY projects often connects you with a community of like-minded individuals who share tips, resources, and support. This can enhance your experience as you learn from others, share your progress, and seek advice on challenges you encounter during your amplifier build.
What Essential Components Do You Need to Build a DIY Digital Amplifier?
To build the best DIY digital amplifier, you need several essential components that work together to produce high-quality sound.
- Power Supply: A reliable power supply is crucial as it provides the necessary voltage and current to your amplifier. Typically, a switched-mode power supply (SMPS) is preferred for its efficiency and compact size, ensuring your amplifier runs smoothly without overheating.
- Amplification Module: This is the core of your amplifier, where the audio signal is boosted. Common choices include Class D amplifiers, which are efficient and compact, making them ideal for DIY projects. Ensure the module matches your desired power output and speaker impedance for optimal performance.
- Heat Sink: As amplifiers generate heat during operation, a heat sink is essential to dissipate this heat and prevent overheating. Selecting the right size and material for the heat sink will enhance the longevity and reliability of your amplifier.
- Input/Output Connectors: Quality connectors are necessary for connecting your amplifier to audio sources and speakers. Use RCA or 3.5mm jacks for inputs and appropriate speaker terminals for outputs, ensuring secure connections to minimize signal loss.
- Enclosure: A sturdy enclosure protects the internal components and provides a finished look to your amplifier. Choose materials like aluminum or wood that can withstand heat and physical stress while also allowing for adequate ventilation.
- Volume Control: Incorporating a volume control potentiometer allows you to adjust the audio output easily. Make sure it is compatible with your amplification module and placed conveniently for user accessibility.
- Wiring and Soldering Supplies: Proper wiring is essential for connecting all components. Use high-quality speaker wire and soldering supplies to ensure strong connections, which will contribute to better sound quality and reliability.
Which Circuit Boards Are Best for DIY Digital Amplifiers?
The best circuit boards for DIY digital amplifiers include several options that cater to different needs and preferences.
- TPA3116D2: This chip is popular for its high efficiency and excellent sound quality.
- LM1875: Known for its simplicity, this board is ideal for beginners and provides a warm sound signature.
- PAM8403: A compact and cost-effective choice, perfect for small projects with moderate power requirements.
- TPA3255: This advanced chip offers high power output and is suitable for more demanding audio applications.
- MAX9744: This board features built-in protections and is designed for ease of use with good sound performance.
TPA3116D2: The TPA3116D2 is a Class D amplifier chip that is highly sought after for DIY projects due to its capability to deliver up to 50W per channel with minimal heat dissipation. Its integrated power management features and low distortion levels make it a favorite among audio enthusiasts looking for quality sound in a compact package.
LM1875: The LM1875 is a classic audio amplifier IC that provides around 20W of power per channel, making it suitable for small to medium speakers. Its straightforward design allows for easy assembly, making it an excellent choice for beginners in the DIY audio community who appreciate its warm sound profile and reliability.
PAM8403: The PAM8403 is a miniature amplifier that operates at 3-5V, making it perfect for battery-powered projects or compact builds. With a power output of 3W per channel, it is an economical solution for portable audio applications where space and power consumption are critical factors.
TPA3255: The TPA3255 is a high-performance digital amplifier that supports Bluetooth connectivity, making it ideal for modern audio setups. Capable of delivering up to 300W per channel, it is perfect for audiophiles looking to drive larger speakers with exceptional fidelity and low distortion.
MAX9744: The MAX9744 features built-in short circuit and thermal protection, making it a safe option for DIY projects. It provides up to 20W per channel and includes a variable gain setting, allowing for customization based on the speaker system and user preferences, making it a versatile choice for various audio setups.
What Types of Power Supplies Are Optimal for DIY Digital Amplifiers?
The optimal power supplies for DIY digital amplifiers vary based on design and performance needs:
- Linear Power Supply: This type offers a stable and low-noise output, which is ideal for high-fidelity audio applications. They use transformers to step down the voltage, followed by rectification and smoothing, resulting in clean power that enhances sound quality.
- Switching Power Supply: Known for their compact size and efficiency, switching power supplies convert power using high-frequency switching techniques. While they can introduce noise, modern designs often include filtering to minimize this and are suitable for applications where space and weight are concerns.
- Battery Power Supply: Batteries provide a clean and isolated power source, eliminating electrical noise from the mains. They are particularly favored in portable amplifier designs, where mobility is key, and can deliver high current output for demanding audio applications.
- Regulated Power Supply: These supplies maintain a constant output voltage despite variations in load current, making them reliable for consistent performance. They can be either linear or switching and are essential for amplifiers that require stable voltage to function optimally.
- Capacitor Power Supply: Utilizing large capacitors to store and release energy, this type can deliver short bursts of high current needed for peak audio performance. They are often used in conjunction with other power supply types to smooth out voltage fluctuations during operation.
What Are the Most Popular Designs for DIY Digital Amplifiers?
The most popular designs for DIY digital amplifiers are:
- Class D Amplifier: This design is known for its high efficiency and compact size, making it ideal for portable audio applications.
- TPA3116 Amplifier: A popular choice among DIY enthusiasts, this chip offers a balance of power and sound quality, suitable for both home and car audio systems.
- TPA3255 Amplifier: This high-performance amplifier chip is favored for its low distortion and high output power, perfect for audiophiles seeking superior sound.
- Gainclone Amplifier: Based on the LM3875 chip, this design is appreciated for its simplicity and excellent sound quality, often hailed as a cost-effective option for beginners.
- Mini Amplifier Kits: These kits often include all necessary components and are designed for ease of assembly, catering to those new to DIY audio projects.
Class D Amplifier: Class D amplifiers use pulse-width modulation to drive the output stage, resulting in very efficient power usage. They are particularly suitable for battery-powered devices where energy conservation is crucial, and their small form factor allows for versatile applications in various audio projects.
TPA3116 Amplifier: The TPA3116 is a highly regarded digital amplifier chip that can deliver up to 50W per channel, depending on the configuration. Its built-in protections and ease of integration make it a favorite among DIY builders looking for good sound quality without the complexity of traditional amplifier designs.
TPA3255 Amplifier: The TPA3255 excels in providing high output power while maintaining low distortion levels, making it an excellent choice for high-fidelity audio systems. Its advanced features, such as integrated protections and feedback mechanisms, ensure reliable performance and sound clarity.
Gainclone Amplifier: The Gainclone design leverages the LM3875 op-amp, delivering high-quality audio at a low cost, which has made it a staple among DIY audio enthusiasts. Its straightforward circuit design allows for easy customization and modification, making it a great project for both newcomers and seasoned builders.
Mini Amplifier Kits: Mini amplifier kits are designed for simplicity and convenience, making them accessible to those who may not have extensive electronics experience. These kits often come with pre-selected components and detailed instructions, allowing users to build a functional amplifier quickly and effectively, often resulting in surprisingly good audio performance for their size.
What Common Challenges Do DIY Enthusiasts Face When Building Digital Amplifiers?
DIY enthusiasts often encounter various challenges when building digital amplifiers.
- Component Selection: Choosing the right components is crucial for the performance of the amplifier. Enthusiasts may struggle with understanding specifications, such as power ratings and impedance, which can lead to suboptimal sound quality or even damage to the amplifier.
- Circuit Design: Designing a circuit that meets specific audio requirements can be complex. Many DIYers may lack experience in analog and digital circuit theory, making it difficult to create a stable, functional design that minimizes noise and distortion.
- Soldering Skills: Proper soldering technique is essential for ensuring reliable connections in the amplifier. Beginners may face challenges with soldering, such as cold joints or overheating components, which can affect the amplifier’s performance or lead to failures.
- Power Supply Issues: A stable power supply is vital for the successful operation of a digital amplifier. DIY enthusiasts must ensure that the power supply can handle the required voltage and current, and any miscalculations can result in inadequate power delivery or damage to the circuit.
- Heat Management: Digital amplifiers generate heat during operation, and managing this heat is important for longevity and performance. Enthusiasts may find it challenging to design adequate heat dissipation solutions, such as heat sinks or fans, which can lead to overheating problems.
- Debugging Problems: Troubleshooting issues in a DIY amplifier can be daunting, especially for those new to electronics. Identifying the source of problems such as distortion or intermittent sound may require advanced diagnostic skills and tools, which not all DIY enthusiasts possess.
- Enclosure Design: Creating a suitable enclosure for the amplifier is often overlooked but is important for both aesthetics and functionality. Enthusiasts may struggle with materials, ventilation, and layout, which can impact the overall performance and user experience of the amplifier.
How Can You Overcome Challenges to Successfully Build a DIY Digital Amplifier?
Building a DIY digital amplifier presents numerous challenges, but with the right strategies, these hurdles can be effectively addressed. Here are key factors to consider:
-
Choosing the Right Components: Research and select high-quality components, including the amplifier chip, power supply, and passive components. Look for well-reviewed kits or designs to serve as a foundation.
-
Understanding Circuit Design: Familiarize yourself with electronic circuit design. Resources such as online courses or textbooks can provide essential knowledge. Basic understanding of Ohm’s Law and circuit theory is crucial.
-
Soldering Skills: Proficiency in soldering can greatly affect the build quality. Practice on scrap boards to improve technique. Invest in a good soldering iron and use appropriate solder for electronic components.
-
Troubleshooting: Familiarize yourself with common issues, like power supply problems or signal distortion. Use a multimeter to test connections and voltages, ensuring all components are functioning correctly.
-
Case Design: Consider the physical housing of your amplifier. A well-ventilated and sturdy enclosure protects components and minimizes interference.
-
Documentation: Keep thorough notes on your design and modifications. This can assist in troubleshooting and refining your build in future projects.
These practical strategies contribute to a successful DIY digital amplifier project, enhancing both the learning experience and final product quality.
Related Post: