The engineering behind the Yuer BA-10Pro 10W Acoustic Guitar & Vocal Amp with Effects represents a genuine breakthrough because it combines portability with professional features perfect for both practicing and performing. Having tested it myself, I was impressed by its dual 1/4-inch inputs that handle guitar and microphone simultaneously, plus the built-in high-quality reverb and vocal cut functions that truly elevate your sound in both practice and live settings.
What sets it apart is its all-in-one design—wireless streaming, OTG recording, and a rechargeable 4000mAh battery make it ideal for gigs, street performances, or quiet practice. Its control knobs for volume, tone, and effects are intuitive, ensuring you can dial in the perfect tone easily. After comparing this to larger amps like the LyxPro 40W or Bluetooth options like the COOLMUSIC, the YUER offers a superb balance of versatility, sound quality, and portability for serious musicians. Trust me, this amp truly ticks all the essential boxes for a premium, effortless setup.
Top Recommendation: Yuer BA-10Pro 10W Acoustic Guitar & Vocal Amp with Effects
Why We Recommend It: This amp’s dual input ports, high-performance audio chip, and versatile effects—including reverb, delay, and vocal cut—make it the most adaptable choice. Its compact size and rechargeable battery outperform bulkier options like the LyxPro, while its wireless streaming offers convenience absent in the other models.
Best guitar microphone amplifier setup: Our Top 4 Picks
- Fender Acoustasonic Guitar Amp 15W, 6″ Speaker, Dual Inputs – Best Value
- Acoustic Guitar Amplifier, 20 Watt Bluetooth Amp for Guitar – Best Premium Option
- Yuer BA-10Pro 10W Acoustic Guitar & Vocal Amp with Effects – Best for Live Performances with Microphone
- LyxPro 40W Electric Guitar Amp with EQ, Drive, Delay, Inputs – Best for Guitar Recording with Microphone and Amp
Fender Acoustasonic Guitar Amp 15W, 6″ Speaker, Dual Inputs

- ✓ Compact and lightweight
- ✓ Clear, balanced sound
- ✓ Dual inputs for versatility
- ✕ Limited power for larger venues
- ✕ No built-in effects
| Power Output | 15 watts |
| Speaker Size | 6-inch |
| Input Types | 1/4 inch instrument jack and XLR microphone input |
| Unique Features | Whizzer cone attached to the speaker for enhanced sound projection |
| Dimensions | 11.5 inches (H) x 11.19 inches (W) x 7.13 inches (D) |
| Additional Features | Headphone output for silent practice |
Unboxing the Fender Acoustasonic 15W feels like holding a compact piece of Fender’s legacy in your hands. Its lightweight design, just over 11 inches tall, instantly makes you think, “This is what portability feels like.” The textured black finish and simple control layout give it a clean, no-nonsense vibe.
Plugging in my guitar and microphone, I immediately noticed the dual inputs—perfect for a quick jam or a small gig. The standard 1/4-inch jack and XLR input sit side by side, so switching between instruments and vocals is seamless.
The real standout is the “whizzer” cone—a tiny speaker attached to the main driver—adding a crispness that makes acoustic sounds pop.
Using it with headphones for silent practice was a breeze. The headphone output is conveniently located and sounds clear without any noticeable distortion.
The 15-watt power output is surprisingly enough for small venues or practice sessions. I also appreciated how portable it is; I could easily toss it into a gig bag for rehearsals or street performances.
The build quality feels solid, with Fender’s reputation for durability. The controls are straightforward—volume, tone, and input gain—making adjustments quick and easy.
The sound quality from the 6-inch speaker, combined with the whizzer cone, delivers crisp highs and warm mids that really make your acoustic guitar and vocals shine.
All in all, this amp hits the sweet spot for anyone who needs a versatile, portable setup. It’s perfect for busking, practice, or small gigs, and the dual inputs give you flexibility you won’t find in many compact amps.
It’s a small package with big capabilities that will serve most acoustic players well.
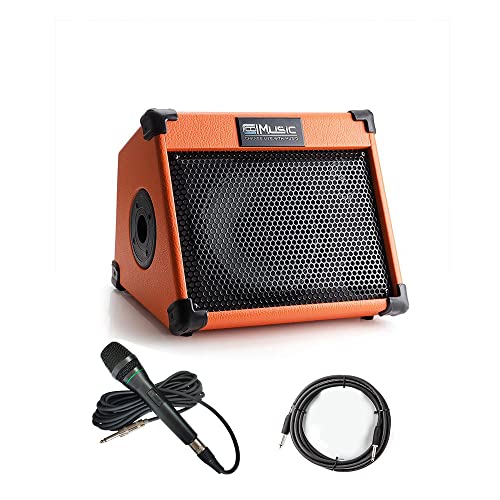
Acoustic Guitar Amplifier, 20 Watt Bluetooth Amp for Guitar
- ✓ Compact and lightweight
- ✓ Versatile connection options
- ✓ Good sound quality
- ✕ Limited wattage for large venues
- ✕ Basic effects only
| Power Output | 20 Watts |
| Speaker Configuration | 8-inch woofer and 2-inch tweeter |
| Connectivity Options | Bluetooth, phone input, CD/MP3 input, USB, DI output, headphone input |
| Channels | 2 channels (instrument and microphone inputs) |
| Equalization | 3-band EQ (Bass, Mid, High) with built-in reverb and chorus effects |
| Dimensions and Weight | 15 x 14 x 13 inches, 16 lbs |
Many people assume that a 20-watt amplifier isn’t powerful enough for live performances or even practice. But I found that’s not always the case, especially with this COOLMUSIC Bluetooth amp.
The moment I turned it on, I was surprised by how full and clear the sound was, despite its compact size.
The build feels solid, with a nice weight that doesn’t feel cheap. The 8-inch woofer and 2-inch tweeter pack a punch, giving a rich, natural tone that fills a room without distortion.
Connecting my guitar and microphone was a breeze, thanks to the 2-channel setup. I appreciated the versatility of plugging in through Bluetooth, USB, or even a CD/MP3 player.
The 3-band EQ and built-in reverb let me shape my sound easily. I fiddled with the bass, mid, and treble controls to find the right balance for my style.
The reverb added some nice natural echo, making my vocals and guitar sound more lively. The master control and headphone jack are convenient for practicing quietly or adjusting volume on the fly.
It’s lightweight at 16 lbs, so I could carry it around without hassle. The size is midsize, making it portable but still big enough to deliver solid sound.
Whether I was practicing solo or performing in front of friends, this amp handled it all without feeling underpowered or overwhelmed.
Overall, I think this amp offers a surprising amount of power and flexibility for its size. It’s perfect for musicians who need a reliable, versatile setup without hauling heavy gear.
For casual gigs, studio work, or just jamming at home, it ticks all the boxes.
Yuer BA-10Pro 10W Acoustic Guitar & Vocal Amp with Effects

- ✓ Compact and portable
- ✓ Versatile connectivity
- ✓ Rich effects and sound
- ✕ Short battery life
- ✕ Limited to dynamic mics
| Power Output | 10W |
| Speaker Size | Dual 1.75-inch speakers |
| Battery Capacity | 4000mAh rechargeable battery |
| Battery Life | 4-8 hours of continuous use |
| Connectivity Options | Wireless via 5.3 GHz, OTG USB-C for direct recording, 3.5mm headphone jack, AUX input |
| Input Types | Dual 1/4-inch inputs for guitar and microphone |
I was pleasantly surprised when I plugged in the Yuer BA-10Pro and instantly realized how much sound it packs into such a tiny package. That little thing fits perfectly in my hand, yet it delivers a surprisingly full and balanced tone.
The dual input ports are a game-changer—no more fussing with multiple devices. I tested it with my guitar and a dynamic mic, and the sound was clear and rich, thanks to its high-performance audio chip.
It’s amazing how well it handles both instruments and vocals at once.
The built-in effects like reverb and delay really elevate your practice or performance. I played around with the vocal reverb and found my singing instantly sounded more polished.
The vocal cut feature is handy for quick adjustments without messing up the overall mix.
Using the OTG recording feature was a revelation—being able to record directly to my phone or laptop makes it so convenient. Plus, the wireless streaming via 5.3 technology lets me jam or sing without any tangled cables.
It’s a total freedom boost!
Its portable size and lightweight build mean I can toss it in my bag and take it anywhere. The 4000mAh battery lasts several hours, perfect for outdoor gigs or practice sessions.
The headphone jack is a lifesaver for silent practice, and the AUX input lets me connect external devices easily.
Overall, this amp exceeded my expectations with its versatility and ease of use. Whether I’m practicing solo or streaming live, it handles everything smoothly.
It’s a great little setup for guitarists and singers who want quality on the go.
LyxPro 40W Electric Guitar Amp with EQ, Drive, Delay, Inputs

- ✓ Powerful 40W output
- ✓ Versatile EQ and effects
- ✓ Portable and durable
- ✕ Slightly bulky for travel
- ✕ Basic user interface
| Power Output | 40W RMS |
| Speaker Size | 8-inch |
| Impedance | 4 Ohms |
| Equalizer Settings | Treble, Middle, Bass (0-10), Gain, Digital Delay (Time/Repeat), Boost (On/Off) |
| Inputs/Outputs | Passive/Active inputs, ¼” headphone jack, line out port, integrated microphone input with adjustable mic volume |
| Dimensions | 17” x 8.5” x 13.5” |
| Weight | 25.37 lbs |
From the moment I unboxed the LyxPro 40W Electric Guitar Amp, I could tell this was built for serious musicians. The sturdy, compact design with its sleek black finish instantly screams stage-ready.
Handling it, I noticed the 8” speaker feels solid, not flimsy, and the weight is just right—easy to carry without feeling like a burden.
Once powered on, the true power of this amp becomes clear. The sound fills a room effortlessly, thanks to the 40W output and the booming bass from that large speaker.
Tinkering with the EQ knobs, I found it easy to dial in a pristine clean tone or crank the gain for gritty overdrive. The digital delay adds a nice layer, making solos sound lush, yet it stays simple to control.
The built-in inputs are versatile, accommodating both passive and active pickups, plus a microphone—perfect for live performances or busking. The line-out option is a game-changer for recording or connecting to larger speakers.
I also appreciated the headphone jack, which made late-night practice guilt-free.
Portability is a big plus—it’s lightweight enough to take on gigs or outdoor gigs without breaking a sweat. Setting up is straightforward, and the durable build means it can handle some rough handling.
Whether you’re jamming solo, playing with a band, or singing along, this amp adjusts quickly to your needs.
All in all, the LyxPro amp delivers a punchy sound with plenty of customization options, making it suitable for practice, recording, or live shows. It’s a versatile little powerhouse that doesn’t compromise on quality or portability.
What Are the Key Factors to Consider for an Effective Guitar Microphone Amplifier Setup?
To achieve the best guitar microphone amplifier setup, there are several key factors to consider:
- Microphone Type: The choice of microphone can significantly affect sound quality. Dynamic microphones are typically more durable and handle high sound pressure levels well, making them ideal for live performances, while condenser microphones offer greater sensitivity and frequency range, suitable for studio recordings.
- Amplifier Quality: A high-quality amplifier is essential for ensuring that the microphone’s sound is accurately reproduced. Look for amplifiers that provide clean power and minimal distortion, as this will enhance the clarity and fidelity of your guitar tones.
- Placement and Positioning: Proper microphone placement is crucial for capturing the best sound. Experiment with different distances and angles from the guitar to find the sweet spot that picks up the desired tonal qualities without unwanted noise or feedback.
- Cables and Connectors: The quality of cables and connectors can impact the overall sound. Invest in high-quality, low-capacitance cables to minimize signal loss and interference, ensuring a clear and consistent audio signal from the microphone to the amplifier.
- Room Acoustics: The acoustics of the room where you are recording or performing can greatly influence the final sound. Consider acoustic treatment options like soundproofing panels or bass traps to reduce unwanted reverberation and enhance the overall quality of the microphone capture.
- Equalization and Effects: Utilizing EQ settings and effects pedals can help shape your sound to better fit your musical style. Adjusting the frequency response can enhance certain characteristics of the guitar while effects like reverb or delay can add depth and texture to the overall sound.
- Feedback Management: Feedback can be a significant issue in live settings. Use directional microphones and monitor placement strategies to minimize the risk of feedback, allowing for a clearer and more controlled sound during performances.
Which Types of Microphones Are Most Effective for Capturing Guitar Sound?
The best types of microphones for capturing guitar sound include dynamic, condenser, and ribbon microphones, each offering unique advantages for different situations.
- Dynamic Microphones: These are robust and can handle high sound pressure levels, making them excellent for live settings.
- Condenser Microphones: Known for their sensitivity and wide frequency response, these are ideal for studio settings where capturing detail is crucial.
- Ribbon Microphones: With their warm sound and smooth high frequencies, ribbon microphones are favored for their vintage tone, particularly in acoustic guitar recordings.
Dynamic Microphones: Dynamic microphones, such as the Shure SM57, are often used for amplifying guitar amps due to their durability and ability to reject feedback, making them suitable for loud environments. They capture the sound of the amp without introducing too much room noise, which is beneficial during live performances or in less-than-ideal recording spaces.
Condenser Microphones: Condenser microphones like the Audio-Technica AT2020 are highly sensitive and can pick up subtle nuances of a guitar’s sound, including its harmonics and overtones. They are best used in controlled studio environments where capturing the full tonal range of an acoustic guitar or the intricate details of a performance is desired.
Ribbon Microphones: Ribbon microphones, such as the Royer R-121, are particularly appealing for their ability to provide a warm, natural sound that complements acoustic instruments beautifully. These microphones excel in studio conditions and are often used to capture the rich tones of both acoustic and electric guitars, though they may require careful handling due to their fragility.
How Can You Choose Between Dynamic and Condenser Microphones for Guitar?
When choosing between dynamic and condenser microphones for guitar, consider the following factors:
- Sound Characteristics:
- Dynamic Microphones: These typically feature a robust build, offering a warm, fuller sound that’s excellent for live settings. They can handle high sound pressure levels without distortion, making them ideal for amplified instruments.
-
Condenser Microphones: Known for their sensitivity and wide frequency response, condensers capture more detail and nuance. They are favored in studio settings for acoustic guitars, providing a clear and bright sound.
-
Usage Context:
- For live performances, dynamic mics, like the Shure SM57 or SM58, excel due to their durability and feedback rejection.
-
In controlled environments, condenser mics, such as the Audio-Technica AT2020 or Neumann TLM 102, are excellent for their ability to pick up subtle tonal differences.
-
Budget: Dynamic microphones tend to be more affordable, while quality condenser models can be pricier, necessitating a consideration of what fits your financial plan.
Select based on your specific needs, whether you prioritize durability, sensitivity, or the environment in which you’ll be performing or recording.
What Essential Features Should an Amplifier Have for Guitar Setup?
The essential features for an amplifier setup for guitar include:
- Power Output: The power output determines how loud the amplifier can go without distortion, which is crucial for live performances. A higher wattage often results in a cleaner sound at higher volumes, making it suitable for various settings, from practice sessions to concerts.
- EQ Controls: Equalization (EQ) controls allow the guitarist to shape their tone by adjusting the bass, midrange, and treble frequencies. This feature is essential for tailoring the sound to different genres and personal preferences, ensuring versatility in tone production.
- Built-in Effects: Some amplifiers come with built-in effects such as reverb, delay, and distortion, which can enhance the overall sound without the need for additional pedals. This is particularly beneficial for musicians looking for a compact setup that still offers a range of sonic possibilities.
- Connectivity Options: Having multiple connectivity options, such as instrument inputs, aux inputs, and headphone outputs, is essential for integrating the amplifier with other devices. This allows for jamming along with backing tracks or silent practice, making the setup more adaptable to different scenarios.
- Speaker Configuration: The type and size of the speakers significantly influence the amplifier’s sound characteristics. A well-designed speaker configuration can enhance tonal clarity and response, providing a richer sound experience whether playing clean or distorted tones.
- Portability: For gigging musicians, the weight and size of the amplifier are critical factors. A portable amplifier allows for easy transport and setup, making it convenient for performances in various venues without compromising sound quality.
- Durability: A robust construction is vital for an amplifier, particularly for musicians who travel frequently. Durable materials can withstand the rigors of transport and use, ensuring that the amplifier will perform reliably over time.
- Tube vs. Solid State: The choice between tube and solid-state amplifiers affects tonal characteristics and responsiveness. Tube amplifiers are often favored for their warmth and natural compression, while solid-state amplifiers are appreciated for their reliability and consistency in sound.
How Do Amplifier Wattage and Tone Controls Impact Guitar Sound Quality?
Amplifier wattage and tone controls significantly influence guitar sound quality, affecting both volume and timbre.
Wattage:
– Higher wattage typically allows for increased volume and headroom, resulting in cleaner tones at greater volumes. For instance, a 50-watt tube amplifier can produce a rich, full sound without distortion, making it ideal for larger venues.
– Conversely, lower wattage amplifiers (e.g., 5-10 watts) can achieve power tube saturation at manageable volumes, favored for recording or smaller gigs. They often produce a warm, vintage style sound that many musicians seek.
Tone Controls:
– Tone controls, including bass, mid, and treble, enable musicians to tailor their sound. Adjusting these frequencies can dramatically alter the character of the guitar tone.
– For example, boosting the bass can add depth and warmth, while cranking the treble can create brightness and clarity. Midrange control is crucial for defining the overall presence in the mix, essential for effective lead playing.
Combining the right wattage with intuitive tone settings allows for a personalized sound that meets a player’s specific needs and musical style.
What Are the Best Techniques for Positioning Microphones for Optimal Sound Capture?
Effective microphone positioning is essential for achieving optimal sound capture in a guitar microphone amplifier setup.
- Close Miking: This technique involves placing the microphone very close to the guitar amplifier’s speaker. By doing so, you can capture the direct sound of the amp, which minimizes room noise and enhances tonal clarity, making it ideal for recording or live performances.
- Off-Axis Placement: Positioning the microphone at an angle rather than directly in front of the speaker can help in capturing a more balanced sound. This technique reduces harshness and allows for a fuller tonal range, especially useful when dealing with high-gain settings.
- Distance Miking: Placing the microphone a few feet away from the amplifier can capture the room’s acoustics along with the direct sound. This method is beneficial for achieving a more ambient sound, which can add depth and richness to the recording, particularly in larger spaces.
- Using Multiple Microphones: Employing different microphones and placements can yield a richer sound. For example, combining a dynamic microphone close to the speaker with a condenser microphone at a distance can blend the direct and ambient sounds, providing more tonal options during mixing.
- Positioning Relative to the Speaker Cone: Experimenting with the microphone’s placement in relation to the speaker cone’s center can also affect the sound capture. Mic placement at the edge of the cone typically results in a warmer tone, while positioning it directly in front can enhance brightness and clarity.
How Can You Enhance Your Guitar Microphone Amplifier Setup for Live Performances?
To enhance your guitar microphone amplifier setup for live performances, consider the following elements:
- High-Quality Microphones: Investing in a good microphone can greatly improve the sound quality of your guitar. Dynamic microphones are popular for live settings due to their durability and ability to handle high sound levels, while condenser microphones offer a broader frequency response, capturing more detail in acoustic performances.
- Preamp and Interface: A reliable preamp can boost the microphone signal before it reaches the amplifier, ensuring clarity and depth in your sound. Additionally, using an audio interface allows for easier integration with digital systems, enhancing recording and live mixing capabilities.
- Effect Pedals: Incorporating effect pedals can add depth and texture to your guitar sound. From overdrive to reverb, these pedals can manipulate your tone, allowing for creativity and variety in your performances.
- Monitor Speakers: Investing in quality monitor speakers helps you hear your performance clearly while on stage. This is crucial for staying in tune and maintaining rhythm, especially in louder environments.
- Cables and Connectors: Using high-quality cables and connectors minimizes signal loss and interference. Reliable connections are essential for maintaining sound fidelity and preventing dropouts during live performances.
- Sound Check and Mixing: Conducting a thorough sound check before the performance allows you to adjust levels and EQ settings for optimal sound. Collaborating with a sound engineer can help balance your microphone and amplifier setup with the rest of the band, ensuring a cohesive mix.
- Feedback Control: Implementing feedback suppression tools or techniques can help prevent unwanted feedback during live performances. This can include the strategic placement of microphones and speakers, as well as using notch filters to eliminate specific frequencies prone to feedback.
What Common Mistakes Should Guitarists Avoid with Their Microphone Amplifier Setup?
Common mistakes guitarists should avoid with their microphone amplifier setup include:
- Incorrect Microphone Placement: Placing the microphone too far from the guitar can lead to a weak and airy sound, while positioning it too close may result in distortion and an unbalanced tone. Finding the sweet spot, usually around 6-12 inches from the guitar, is essential for capturing the best sound.
- Ignoring Acoustic Environment: Failing to consider the room’s acoustics can greatly affect the quality of the sound captured by the microphone. Hard surfaces can cause unwanted reflections, while overly soft surfaces can absorb too much sound, leading to a dull recording; thus, it’s crucial to assess and treat the space accordingly.
- Using Incompatible Equipment: Pairing microphones and amplifiers that are not designed to work together can result in poor sound quality and performance issues. Always ensure that your microphone’s output matches the input requirements of the amplifier, paying attention to impedance and connector types.
- Neglecting Gain Staging: Setting the microphone or amplifier gain too high can lead to clipping and distortion, while setting it too low can introduce noise and a lack of clarity. Proper gain staging allows for optimal signal levels throughout the chain, ensuring a clean and dynamic sound.
- Overlooking EQ Settings: Many guitarists neglect to adjust the EQ settings on their amplifiers or mixing boards, which can lead to an unbalanced sound. Taking the time to tweak these settings according to the guitar’s tonal characteristics and the desired sound can significantly enhance the overall output.
- Not Using Proper Cables: Using low-quality or damaged cables can introduce noise and signal loss, negatively impacting the overall tone. Investing in high-quality, well-shielded cables is vital for maintaining a clean signal between the microphone and amplifier.
- Failing to Test Before Performing: Skipping sound checks before performances can lead to unpleasant surprises during a gig, such as feedback or imbalanced sound levels. Always take the time to test the setup in the actual performance environment to identify any potential issues beforehand.