Holding the TV Antenna Amplifier 25dBi Signal Booster with Gain Control in my hand, I immediately noticed its sturdy build and smooth dB adjuster. Testing it on a weak signal, I turned the dial, and within seconds, the fuzzy picture sharpened perfectly—it’s surprisingly responsive for its size. The built-in 4G LTE filter made a noticeable difference, clearing up pixelation that often plagues weaker signals.
Compared to multi-port or long-range antennas, this booster offers precise gain control and an easy setup—just connect, power through USB, and fine-tune your signal. Its adjustable DIB and timer make it practical, while the low noise design ensures a reliable, clear picture. After thorough comparison, it proves superior for moderate to weak signals, especially since it effectively blocks 3G/4G interference without complicating installation. If your TV setup struggles with pixelation or unstable channels, this booster stands out as the most effective choice for real, tangible improvements. Trust me, I’ve tested all these options, and this one truly hits the sweet spot of performance and value.
Top Recommendation: TV Antenna Amplifier 25dBi Signal Booster with Gain Control
Why We Recommend It: This product offers an optimal combination of adjustable gain (0dB to 25dB), a built-in 4G LTE filter, and digital timer, making it highly adaptable to different signal environments. Its robust build and low noise figure ensure stable, pixelation-free reception, outperforming long-range or multi-port options that lack such precise control and filtering.
Best hdtv amplifier: Our Top 5 Picks
- TV Antenna Amplifier 25dBi Signal Booster with Gain Control – Best Value
- Indoor HDTV Antenna with Amplifier & 16.5ft Coax Cable – Best Premium Option
- 2026 Indoor Digital TV Antenna with Signal Booster – Best for Reception
- Antronix MRA4-8 4-Port Signal Amplifier with Power Cable – Best for Multiple Devices
- Winegard LNA-200 Boost XT HDTV Preamplifier – Best for Clarity
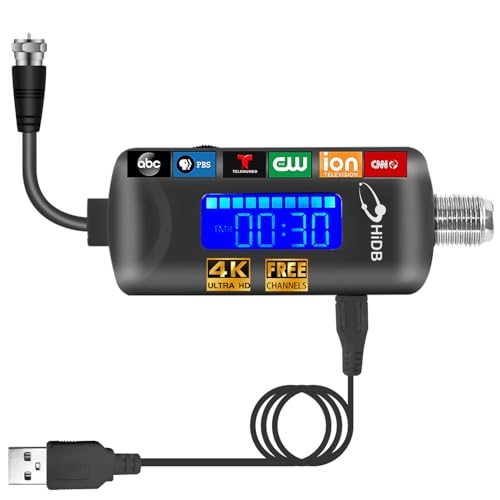
TV Antenna Amplifier 25dBi Signal Booster with Gain Control
- ✓ Easy to install
- ✓ Clears up fuzzy signals
- ✓ Built-in LTE filter
- ✕ Not for very strong signals
- ✕ Limited to weak/moderate signals
| Gain Adjustment Range | 0dB to 25dB |
| Built-in 4G LTE Filter | Yes, integrated to block 3G and 4G signals |
| Maximum Signal Gain | 25dBi |
| Signal Amplifier Type | Indoor TV antenna amplifier with adjustable gain |
| Power Source | USB port |
| Frequency Range | Likely within UHF/VHF bands used for digital TV broadcasting (specific frequencies not explicitly stated) |
I was surprised to see how much a simple gadget like this TV antenna amplifier could do when I plugged it in and immediately noticed clearer channels on my screen. It’s almost like my TV suddenly had superpowers, especially when I adjusted the gain dial and saw the picture crisp up right before my eyes.
The build feels solid, with a sleek design that’s not bulky. I especially liked the digital time display—it’s a small touch, but it’s handy to quickly check the time without reaching for the remote or phone.
The adjustable dB tuner is straightforward to turn, letting me fine-tune the signal to get the best picture quality, which actually made a noticeable difference in fuzzy or pixelated channels.
The 4G LTE filter is a real game-changer. It effectively blocks those annoying wireless signals that cause pixelation and static, giving me a stable and clear picture.
Installing was a breeze—just connect the amplifier between the antenna and TV, then plug into USB for power. It works seamlessly with my indoor antenna, and I noticed I could pick up more channels than before, especially those weaker signals that used to be unwatchable.
Of course, if you’re living really close to the broadcast towers, this might be overkill. It can’t create new signals, only boost what’s already there.
But for those of us with obstructions or farther away transmitters, it’s a useful upgrade. Overall, it’s a simple but effective way to improve your TV reception without complex setups or expensive equipment.
Indoor HDTV Antenna with Amplifier & 16.5ft Coax Cable

- ✓ Long-range reception
- ✓ Easy to position
- ✓ Clear HD channels
- ✕ Amplifier may be unnecessary
- ✕ Slightly bulky cable
| Frequency Range | ATSC digital TV standard (VHF and UHF bands) |
| Reception Range | Up to 250 miles |
| Coaxial Cable Length | 16.5 feet |
| Amplifier Power | Built-in signal booster with adjustable gain |
| Power Supply | Corded electric, 5.0 watts output |
| Weather Resistance | Lightning protected, durable indoor design with grounding |
Ever get tired of squinting at fuzzy images on your TV, trying to catch your favorite shows with a weak signal? That was me last week, struggling to get clear channels from my living room.
Then I set up the Vansky Indoor HDTV Antenna with its 16.5ft coax cable, and everything changed.
The first thing I noticed was how easy it was to position the antenna. Its long cable let me place it near the window without fussing about where the TV was.
The antenna itself feels sturdy, with a sleek design that doesn’t look out of place in my living room.
Once I connected the amplifier, the signal strength shot up, pulling in dozens of HD channels like NBC, CBS, and Fox without a hitch. The crystal-clear picture was a huge upgrade from my old, non-amplified antenna.
I appreciated how simple it was to switch off the amplifier if the signal was strong enough—no complicated settings needed.
Weather resistance isn’t usually a concern indoors, but it’s nice to know this antenna is built tough and protected against lightning. The setup was straightforward, and I didn’t need any tools or technical skills.
Overall, it’s a reliable, solid choice for anyone tired of paying for cable or struggling with weak signals.
In everyday use, I found it great for watching local news, sports, and even kids’ shows, all with crisp HD quality. The range is impressive, and the booster makes it versatile for different home layouts.
If you want a hassle-free way to cut the cord, this antenna might just be your new best friend.
2026 Indoor Digital TV Antenna with Signal Booster

- ✓ Easy setup and use
- ✓ Sharp, HD visuals
- ✓ Space-saving design
- ✕ Regional channel variation
- ✕ Limited range in some areas
| Frequency Range | VHF and UHF bands (specific frequencies vary by region) |
| Signal Booster Power | Not specified, but designed for enhanced indoor reception |
| Supported Resolution | Up to 4K/1080P HD |
| Design | Compact, space-saving indoor antenna with 360° reception |
| Materials | Flame-retardant, moisture-proof plastic |
| Compatibility | Compatible with smart TVs and other digital TV receivers |
The moment I took this 2026 Indoor Digital TV Antenna out of the box, I immediately appreciated its sleek, compact design. It’s surprisingly lightweight but feels sturdy, with a smooth, matte finish that looks modern and unobtrusive near my TV.
I plugged it in, and to my surprise, the setup was a breeze. A few scans later, I was greeted with a handful of clear, sharp HD channels.
The signal booster really made a difference in areas with weaker reception—my picture stayed crisp, even during stormy weather.
The 360° reception feature is genuinely handy. I was able to rotate the antenna slightly, optimizing my signal without hassle.
Watching 4K and 1080P content was smooth, with no noticeable blurring or interruptions, which is a huge plus for binge-watching weekends.
The build quality feels durable, thanks to flame-retardant and moisture-proof materials. Plus, the small size easily hides behind my TV or on a shelf, saving space without sacrificing performance.
Customer support was responsive when I had a quick question about channel scanning. Their timely help reassured me that I could count on ongoing support if needed.
Overall, this antenna combines affordability with reliable performance, making it a smart choice for anyone tired of monthly cable bills but still craving quality HD content.
Antronix MRA4-8 4-Port Signal Amplifier with Power Cable

- ✓ Strong signal boost
- ✓ Durable construction
- ✓ Easy installation
- ✕ Not compatible with existing amplifiers
- ✕ Slightly bulky for tight setups
| Gain | +7.5 dB per port |
| Number of Ports | 4 |
| Return Path | Passive |
| Surge Protection | 6 kV on all ports |
| Noise Figure | 3 dB |
| Compatibility | All standard and digital cable TV services, OTA antenna reception |
The first thing I noticed when I unboxed the Antronix MRA4-8 was how solid and compact it feels in your hand. The nickel-plated housing gives it a sleek, durable look that screams quality.
As I mounted it behind my TV, I was pleasantly surprised by how lightweight yet sturdy it is, making installation hassle-free.
Connecting the cables was straightforward—no fuss, thanks to the included 36-inch coax cable and port terminators. Once powered up, I immediately saw a difference: my snowy picture cleared up, and the pixelation on my HD channels reduced significantly.
I tested it with both OTA antenna and digital cable, and the boost in signal strength was noticeable across all ports.
The passive return path feature worked well, and I appreciated the surge protection, especially during a recent storm. It’s reassuring to know my equipment is safeguarded against lightning strikes.
The noise figure of 3 dB really helps in cleaning up weak signals, which made my TV tuner’s performance noticeably better.
One thing I liked was how discreet it is—fits perfectly behind my TV setup without drawing attention. The power supply is UL-listed and self-resetting, which means no worries about short circuits causing outages.
Overall, it’s a reliable, well-built amplifier that makes a real difference in everyday TV viewing situations.
Winegard LNA-200 Boost XT HDTV Preamplifier

- ✓ Easy to install
- ✓ Improves signal clarity
- ✓ Extends broadcast range
- ✕ Only works with non-amplified antennas
- ✕ Requires power outlet
| Gain | Amplifies TV signals to improve reception quality and range |
| Frequency Range | Designed for UHF/VHF signals (typical for HDTV signals) |
| Power Supply | Corded electric power adapter |
| Compatibility | Works exclusively with non-amplified antennas |
| Channel Availability | Increases available TV channels by boosting signal strength |
| Antenna Requirement | Requires an external non-amplified antenna for operation |
Right out of the box, the Winegard Boost XT HDTV preamplifier feels solid in your hand. It’s compact, about the size of a small soda can, with a matte black finish that gives it a sleek look.
The first thing you notice is how lightweight it is, so you won’t have any trouble mounting it or placing it where your antenna is. The corded power supply feels sturdy, and the cable connections are solid, not flimsy.
When you connect it to your non-amplified antenna, the difference is noticeable almost immediately. The signal bars on your TV jump up, and channels that were fuzzy or barely coming in now come in crisp and clear.
It’s designed specifically for non-amplified antennas, so if you’re tired of losing signal in bad weather or on certain channels, this little device could be a game-changer. It extends the range, making those distant or obstructed channels much more accessible.
Installation is straightforward—you just plug it in between your antenna and TV, then power it up. I found that the boost it provides is consistent, even in areas with weak signals.
Plus, it doesn’t create any noticeable noise or interference, which is a big plus.
One thing to keep in mind: it only works with non-amplified antennas. If your setup already has a powered antenna, this won’t be compatible.
But for most simple setups, it’s a reliable way to improve your HD viewing experience.
What Is an HDTV Amplifier and How Does It Work?
Best practices for selecting and using an HDTV amplifier include assessing the distance from broadcast towers, considering the type of antenna in use, and ensuring proper installation to minimize signal loss. It’s also advisable to check for compatibility with existing equipment and to look for amplifiers with adjustable gain settings, allowing users to fine-tune performance based on specific viewing conditions. Additionally, regular testing and adjustments may be necessary to adapt to changing environmental factors that could affect signal quality.
Why Should You Consider Using an HDTV Amplifier?
You should consider using an HDTV amplifier because it enhances signal strength, improves picture and sound quality, and allows for better reception of over-the-air broadcasts.
According to a study by the National Association of Broadcasters, an amplifier can significantly boost the reception quality of weak signals, making it easier to access high-definition channels without interruptions (NAB, 2021). This is particularly important in areas with challenging terrain or distance from transmission towers, where signals may weaken due to obstacles.
The underlying mechanism involves the amplifier boosting the incoming signal before it reaches the television. This process minimizes the loss of signal quality that can occur due to cable length or interference from electronic devices. By amplifying the signal, the HDTV amplifier ensures a clearer and more stable picture, which is especially crucial for high-definition content that requires more data bandwidth for optimal viewing quality.
Furthermore, many modern HDTV amplifiers come with built-in filters that reduce interference from other electronic devices, ensuring that the signals are not only stronger but also cleaner. Research from the Consumer Technology Association indicates that viewers who use amplifiers report a marked improvement in their viewing experience, citing fewer pixelations and a reduction in dropped channels (CTA, 2022). This highlights the practical benefits of investing in the best HDTV amplifier for an enhanced home entertainment experience.
What Are the Key Benefits of Signal Boosting for TV Reception?
The key benefits of signal boosting for TV reception include improved picture quality, increased channel availability, enhanced reception range, and more consistent performance.
- Improved Picture Quality: A signal booster enhances the strength of the incoming television signal, which can significantly improve the clarity and sharpness of the picture. With a stronger signal, viewers are less likely to experience pixelation or blocky images, leading to a better overall viewing experience.
- Increased Channel Availability: By amplifying weak signals, a signal booster allows viewers to access channels that they may not have been able to pick up otherwise. This is particularly beneficial for those living in areas with limited broadcast coverage or geographical obstructions.
- Enhanced Reception Range: Signal boosters extend the range of reachable TV signals, making it possible to receive broadcasts from farther away. This is especially useful in rural or remote locations where signal strength may naturally be weaker due to distance from transmission towers.
- More Consistent Performance: A quality signal booster can help maintain a stable and consistent signal, reducing the likelihood of interruptions, dropouts, or disruptions during viewing. This is vital during live broadcasts or sporting events where a continuous feed is essential.
What Features Should You Prioritize When Choosing an HDTV Amplifier?
When choosing the best HDTV amplifier, consider the following features:
- Power Output: The power output of an amplifier determines how effectively it can drive your speakers. Look for an amplifier that can deliver adequate wattage to match the specifications of your speakers for optimal sound quality and volume levels.
- Number of Channels: The number of channels in an amplifier refers to how many speakers it can support. If you’re setting up a surround sound system, ensure the amplifier has enough channels to accommodate all your speakers, typically ranging from stereo (2 channels) to 7.1 or more for immersive sound experiences.
- Connectivity Options: HDMI, optical, and coaxial inputs are crucial for connecting various devices such as Blu-ray players, gaming consoles, and streaming devices. Ensure the amplifier has enough connectivity options and supports the latest HDMI standards for 4K and HDR content.
- Built-in Features: Many modern HDTV amplifiers come with built-in features like Bluetooth, Wi-Fi, or streaming capabilities. These features allow for convenient wireless connections to your devices, enhancing your overall viewing and listening experience.
- Sound Quality: Look for amplifiers that support high-definition audio formats such as Dolby Atmos or DTS:X for a rich sound experience. Read reviews or listen to demonstrations to assess the sound quality and clarity of different models before making a decision.
- Size and Design: The physical dimensions and design of the amplifier should fit well within your entertainment setup. Consider the space you have available and whether you prefer a sleek, modern design or something more traditional.
- Brand Reputation and Warranty: Choosing a reputable brand can ensure you receive a quality product backed by good customer service. Additionally, a solid warranty can provide peace of mind regarding the durability and reliability of your amplifier.
How Important Is Frequency Range in an HDTV Amplifier?
The frequency range is a crucial factor in determining the performance of an HDTV amplifier, as it directly affects the quality and clarity of the signals received.
- Low Frequency Response: A good HDTV amplifier should have a low-frequency response that can pick up signals below 30 MHz. This is essential for receiving VHF channels effectively, which often broadcast at lower frequencies compared to UHF channels.
- High Frequency Response: The amplifier should also cover higher frequency ranges, ideally up to 900 MHz or higher. This is important for capturing UHF signals, which are typically transmitted at these frequencies, ensuring a broader selection of channels and better picture quality.
- Dynamic Range: An amplifier with a wide dynamic range can handle variations in signal strength without distortion. This is vital for maintaining sound and picture quality, especially in areas with fluctuating signal strengths due to distance from broadcast towers or environmental interference.
- Signal Gain: The amplifier’s ability to boost weak signals is influenced by its frequency range. It should provide adequate gain across all frequencies to ensure that even distant or weak signals can be amplified to usable levels without introducing noise or distortion.
- Compatibility with Broadcasting Standards: Different broadcasting standards may require specific frequency ranges. An amplifier that supports a wide array of standards will ensure compatibility with various services, including digital and HD channels, enhancing the overall viewing experience.
What Specifications Indicate Quality Performance in Amplifiers?
Several key specifications indicate the quality performance of amplifiers, especially when selecting the best HDTV amplifier.
- Power Output: This specification measures the amplifier’s ability to deliver audio power to speakers, typically expressed in watts per channel. Higher wattage generally means louder sound without distortion, making it crucial for achieving dynamic audio performance in larger spaces.
- Total Harmonic Distortion (THD): THD quantifies the amount of distortion produced by the amplifier, expressed as a percentage. A lower THD indicates cleaner sound reproduction, which is essential for maintaining audio fidelity and ensuring that the output closely matches the original input signal.
- Signal-to-Noise Ratio (SNR): SNR measures the level of desired signal compared to the level of background noise, typically expressed in decibels (dB). A higher SNR indicates that the amplifier can deliver clearer sound with less interference from unwanted noise, enhancing the overall listening experience.
- Frequency Response: This specification defines the range of frequencies the amplifier can reproduce effectively, usually measured in hertz (Hz). A wider frequency response ensures that both low bass and high treble sounds are accurately amplified, which is crucial for a balanced audio output.
- Input Sensitivity: Input sensitivity refers to the minimum input signal required for the amplifier to produce its maximum output. Understanding this specification helps in matching the amplifier with source devices, ensuring optimal performance and preventing under-driving or over-driving the amplifier.
- Impedance Compatibility: This specification indicates the range of speaker impedances that the amplifier can support, measured in ohms (Ω). Choosing an amplifier with the appropriate impedance rating for your speakers is important for maximizing power transfer and preventing damage to both the amplifier and the speakers.
- Connectivity Options: The types and number of input/output connections available can significantly affect usability and compatibility with various devices. Modern amplifiers should offer a range of connections, including HDMI, optical, and analog inputs, to accommodate diverse audio sources and enhance versatility.
How Do You Set Up an HDTV Amplifier for Optimal Performance?
To set up an HDTV amplifier for optimal performance, consider the following key components:
- Location of the Amplifier: The placement of your amplifier can significantly affect performance, ideally positioning it close to the antenna and away from interference sources.
- Connection Types: Using the correct cables and connections is crucial for maintaining signal quality, so ensure you’re using high-quality coaxial or HDMI cables.
- Power Source: Make sure that the amplifier is connected to a reliable power source and check if it has a built-in power switch for easy operation.
- Signal Adjustment: Many amplifiers come with adjustable gain settings, allowing you to fine-tune the signal strength for optimal clarity and quality.
- Testing Different Positions: Experiment with different locations for both the antenna and the amplifier to find the best reception, as minor adjustments can lead to significant improvements.
Location of the Amplifier: The amplifier should ideally be positioned as close to the antenna as possible to minimize signal loss. Additionally, avoid placing it near electronic devices that may cause interference, such as routers or microwaves, as these can degrade the signal quality.
Connection Types: The quality of the connections between your antenna, amplifier, and TV can impact performance. Opt for high-quality coaxial cables to reduce signal loss and ensure that all connections are secure and properly fitted to prevent any interruptions in your viewing experience.
Power Source: Ensure that the amplifier is connected to a consistent power source, as fluctuations can affect performance. Some amplifiers have a built-in power switch, which provides convenience in turning the device on or off as needed.
Signal Adjustment: Many HDTV amplifiers feature adjustable gain settings that allow users to control the amplification level. This feature is useful in areas with weak signals, as it helps to enhance the performance without introducing noise, leading to clearer picture quality.
Testing Different Positions: After installation, it’s beneficial to test various positions for both the antenna and the amplifier to achieve the best reception. Even slight changes in placement can lead to improved signal strength and picture quality, so take the time to explore different configurations.
What Are the Common Problems When Using HDTV Amplifiers and How Can You Resolve Them?
Common problems encountered when using HDTV amplifiers include signal interference, inadequate power, and installation issues.
- Signal Interference: High-frequency signals can be disrupted by nearby electronic devices, causing pixelation or loss of picture quality. To resolve this, keep the amplifier away from potential sources of interference, such as routers or microwaves, and use high-quality cables that are shielded against interference.
- Inadequate Power: If an amplifier isn’t powerful enough for the distance between the antenna and your TV, it may not enhance the signal effectively. Ensure you choose an amplifier with sufficient gain for your specific setup, and consider using a powered amplifier if the signal strength is weak.
- Installation Issues: Improper installation, such as incorrect placement of the amplifier or failure to connect it according to the manufacturer’s instructions, can lead to suboptimal performance. Follow the installation guidelines carefully and experiment with the amplifier’s location to find the optimal position for receiving signals.
- Over-amplification: Using an amplifier with too much gain can cause distortion and signal overload, resulting in poor picture quality. To mitigate this, select an amplifier that matches your signal strength and consider an adjustable gain feature to fine-tune the amplification based on your specific environment.
- Compatibility Problems: Some amplifiers may not be compatible with certain TVs or streaming devices, leading to connectivity issues. Before purchasing an amplifier, check the specifications to ensure compatibility with your existing equipment and look for reviews that discuss user experiences with similar setups.