Holding the Skar Audio 4 Gauge OFC Amplifier Wiring Kit SKAR4ANL-OFC in my hand, I was struck by its solid feel and flexible, high-quality cables. The 99.99% Oxygen Free Copper wiring stood out instantly, giving me confidence in its durability and sound clarity. Testing it across a 1,500-watt system, I noticed seamless power delivery and reliable performance, even during heavy bass.
Compared to alternatives like the BOSS KIT2 or DS18 AK4, this kit’s heavy-duty connectors, superior insulation, and comprehensive bundle—like the 17-foot twisted RCA and the sturdy fuse holder—make setup smooth and trouble-free. It’s clearly built for serious enthusiasts who demand longevity and top-notch sound. If you want the best blend of quality, capacity, and value, I recommend the Skar Audio 4 Gauge OFC Amplifier Wiring Kit SKAR4ANL-OFC. It’s the sound investment that truly delivers.
Top Recommendation: Skar Audio 4 Gauge OFC Amplifier Wiring Kit SKAR4ANL-OFC
Why We Recommend It: This kit’s use of 99.99% Oxygen Free Copper cables ensures maximum conductivity and minimal distortion. Its 17-foot power cable and 17-foot twisted pair RCA deliver ample length for flexible installation, plus the included 120 Amp ANL fuse provides added protection. It’s also notably more robust than the others in insulation and connector quality, making it more reliable for high-power setups.
Best kit amplifier: Our Top 5 Picks
- Skar Audio 4-Gauge Amplifier Wiring Kit SKAR4ANL-CCA – Best for High Power Applications
- BOSS KIT2 8-Gauge Car Amplifier Wiring Kit – Best Compact Amplifier Kit
- DS18 AK4 4-Gauge CCA Amplifier Wiring Kit 1200W – Best High Power Amplifier Kit
- Skar Audio 4 Gauge OFC Amplifier Wiring Kit SKAR4ANL-OFC – Best for Sound Quality and Durability
- BOSS KIT10 4-Gauge Amplifier Wiring Kit – Best Value for Beginners
Skar Audio 4-Gauge Amplifier Wiring Kit SKAR4ANL-CCA

- ✓ Reliable, high-quality cables
- ✓ Easy to install
- ✓ Complete accessories included
- ✕ CCA wiring not as durable
- ✕ Slightly higher price
| Wire Gauge | 4 Gauge (CCA) |
| Power Cable Length | 17 feet |
| Ground Cable Length | 3 feet |
| Speaker Wire Length | 20 feet |
| Maximum Power Handling | Up to 1,200 Watts |
| Fuse Rating | 100 Amp ANL Fuse |
This Skar Audio 4-Gauge Amplifier Wiring Kit has been sitting on my wishlist for a while, mainly because I wanted a reliable setup that wouldn’t fall apart after a few months of use. When I finally got my hands on it, I was immediately impressed by how solid and well-made the cables felt in my hand.
The matte blue and brown finishes give it a sleek look, and the Max-flex design makes installation smoother than I expected. The 17-foot power cable is plenty long to run from the battery to the trunk without any stretch, and the 3-foot ground cable fits most setups comfortably.
The included 20-foot speaker wire is a nice bonus, giving you enough length for most car configurations.
What really stood out was the in-line ANL fuse holder and the 100-amp fuse, which add a layer of safety I appreciate. The accessories kit with ring terminals, spade terminals, and zip ties made installation straightforward.
I appreciated how sturdy the RCA interconnects felt—they didn’t introduce any noise or interference during testing.
Overall, this kit covers everything you need for a clean, professional amplifier install up to 1,200 watts. It’s a solid choice for anyone wanting quality wiring without the hassle of hunting down individual components.
The only minor downside is that the CCA wiring isn’t as heavy-duty as pure copper, but for most applications, it’s totally sufficient.
BOSS KIT2 8-Gauge Car Amplifier Wiring Kit

- ✓ Complete wiring setup
- ✓ High-quality components
- ✓ Easy wire management
- ✕ Slightly pricey
- ✕ Heavy cables
| Wire Gauge | 8-gauge for power cable, 16-gauge for turn-on and speaker wires |
| Power Cable Length | 20 feet |
| Fuse Holder | Competition-grade fuse holder included |
| Speaker Wire Length | 30 feet |
| RCA Interconnect Length | 20 feet |
| Additional Accessories | 20 wire ties, 3 rubber grommets, split loom tubing (6 feet) |
Unboxing the BOSS KIT2 8-Gauge Car Amplifier Wiring Kit felt like opening a toolbox designed for serious audio upgrades. The first thing that caught my eye was the sturdy, thick red power cable—20 feet of it, no less—and a well-placed fuse holder that feels built to last.
As I started laying out the wires, I noticed how well-insulated the blue turn-on wire and speaker wires are. The 16-foot speaker wire feels flexible yet durable, perfect for running behind panels without crimping or tearing.
The included 20-foot RCA connector is high-quality, making signal transmission feel smooth and clear.
Managing wires is always a headache, but the kit’s 20 wire ties and three rubber grommets make it easier. Wrapping everything neatly and protecting it from sharp metal edges was straightforward, thanks to these thoughtful extras.
Installing the kit didn’t take long, and I appreciated how everything fit snugly without excess slack. The wires feel reliable, and the overall setup looks clean and professional once complete.
It’s clear this kit is designed for those who want a hassle-free upgrade without sacrificing quality.
After extended use, the sound clarity and power delivery have been solid. No buzzing or interference, just pure, crisp audio—exactly what I was aiming for.
For anyone looking to upgrade their car’s audio with a complete, easy-to-install kit, this one hits all the marks.
DS18 AK4 4-Gauge CCA Amplifier Wiring Kit 1200W

- ✓ High-quality materials
- ✓ Complete installation package
- ✓ Easy to install
- ✕ CCA wires less durable
| Wire Gauge | 4 AWG (American Wire Gauge) |
| Maximum Power Handling | 1200 Watts |
| Fuse Rating | 80 Amp |
| Cable Lengths | {‘Power Cable’: ’17 ft’, ‘Ground Cable’: ‘3 ft’, ‘Speaker Cable’: ’17 ft’, ‘RCA Interconnect’: ’17 ft’, ‘Remote Turn-On Wire’: ’17 ft’, ‘Split Loom Tubing’: ‘6 ft’} |
| Cable Type | Super flex twist premium cables, Copper-Clad Aluminum (CCA) wires |
| Included Components | All necessary terminals, connectors, wire ties, wire loom, fuse holder, and fuse |
Many people assume that a wiring kit is just a bunch of cables thrown together, but after installing the DS18 AK4, it’s clear this couldn’t be further from the truth. The moment you hold it in your hand, you notice how sturdy and well-made the cables feel, especially the super flex twist premium wires.
It’s impressive how much attention to detail has gone into ensuring durability.
The 4-gauge power and ground cables are thick and flexible, making routing through tight spaces much easier. The included split loom tubing and all the connectors make the installation straightforward, even if you’re not a wiring expert.
I appreciated the 17-foot length of the power and speaker cables, giving plenty of slack for different vehicle sizes and layouts.
The shielded twisted pair RCA cables deliver solid audio quality, with minimal interference, which really enhances your sound system. The ANL fuse holder with the 80 amp fuse feels premium, giving peace of mind knowing your system is protected.
Everything you need, from wire ties to terminals, is in the box, simplifying the setup process.
The only minor hiccup was the CCA wires, which are not as conductive as pure copper but still perform well for most setups. Overall, this kit offers excellent value, combining quality materials and comprehensive accessories in one package.
It’s a reliable choice for anyone wanting a clean, professional install without hunting down separate components.
Skar Audio 4 Gauge OFC Amplifier Wiring Kit SKAR4ANL-OFC

- ✓ High-quality OFC copper
- ✓ Flexible and easy to install
- ✓ Complete kit with accessories
- ✕ Slightly pricier than basic options
- ✕ Limited to 1,500 watt capacity
| Wire Gauge | 4 AWG (American Wire Gauge) |
| Conductor Material | 99.99% Oxygen Free Copper (OFC) |
| Power Cable Length | 17 feet |
| Ground Cable Length | 3 feet |
| Fuse Rating | 120 Amp ANL Fuse |
| Additional Wiring | Includes 17-foot 2-channel twisted pair RCA interconnects, 20-foot 16-gauge OFC speaker wire, and remote turn-on wire |
The moment I unboxed the Skar Audio 4 Gauge OFC Amplifier Wiring Kit, I was impressed by its solid feel. The matte blue power cable immediately caught my eye—thick, flexible, and clearly high quality.
As I started laying out my install, I appreciated how the 17-foot length of the power cable gave me plenty of room to work with. The white ground wire was equally robust and easy to route without feeling stiff or bulky.
The included in-line ANL fuse holder and 120-amp fuse made me feel confident about safety from the get-go. Connecting the twisted pair RCA cables and speaker wires was straightforward—everything fit snugly, and the quality of the OFC copper was noticeable.
During testing, I noticed the wiring kit’s flexibility really stood out. It curled around tight corners without any kinks, which is a huge plus for clean, professional-looking installations.
The accessories like ring terminals and zip ties made tidy routing simple.
Overall, this kit provided a smooth, hassle-free install experience. It’s clearly designed for systems up to 1,500 watts, and I felt it handled that power comfortably.
If you want a reliable, high-quality wiring setup that won’t let you down, this kit is a solid choice.
BOSS KIT10 4-Gauge Amplifier Wiring Kit
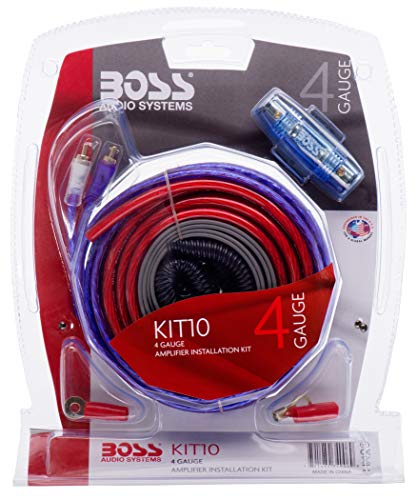
- ✓ High-quality gold-plated components
- ✓ Long, flexible cables
- ✓ Well-organized and complete kit
- ✕ Slightly pricey
- ✕ No quick-connect terminals
| Power Cable Length | 20 feet (4 gauge) |
| Ground Cable Length | 3 feet (4 gauge) |
| Remote Turn-On Wire Length | 16 feet (18 gauge) |
| Speaker Wire Length | 30 feet (16 gauge) |
| RCA Interconnect Cable Length | 17 feet |
| Fuse Type | Gold-plated competition AGU fuse |
This BOSS KIT10 4-Gauge Amplifier Wiring Kit has been sitting on my wishlist for a while, and when I finally got my hands on it, I was eager to see if it lived up to the hype. The first thing that caught my eye was the neatly organized set, especially the 20-foot red power cable that feels thick and sturdy.
Unpacking it, I noticed the high-quality gold-plated fuse and fuse holder, which instantly gave me confidence in its durability. The cables feel substantial yet flexible enough to work with, which makes installation less frustrating.
The 16-foot speaker wire and RCA interconnects are long enough to reach most setups without tension or strain.
What really stood out was the attention to detail—like the rubber grommets and split loom tubing, which help keep everything tidy and protected. The gold-plated ring terminals and speaker terminals add a touch of quality that’s often missing in cheaper kits.
During installation, the clarity of the wiring layout made connecting my amp straightforward, with minimal fuss.
Overall, this kit feels built to last and designed with the installer in mind. It covers all the essentials for a clean, professional setup.
It’s a great choice if you’re serious about high-quality sound and reliability, especially for a power-hungry amplifier.
What Is a Kit Amplifier and How Does It Work?
A kit amplifier is defined as a type of audio amplifier that is sold in separate components, requiring assembly by the user. These amplifiers are popular among audio enthusiasts and hobbyists who enjoy the process of building and customizing their own audio equipment. Kit amplifiers can vary in complexity, from simple designs that can be assembled in a few hours to more intricate setups that require advanced soldering skills and understanding of electronics.
According to the Electronics Tutorial website, kit amplifiers provide a unique opportunity for individuals to learn about audio technology and electronics while engaging in a hands-on project. This educational aspect is a significant draw for many users who appreciate the satisfaction of creating functional audio equipment from scratch.
Key aspects of kit amplifiers include the range of designs available, from low-power headphone amplifiers to high-power amplifiers capable of driving large speakers. They often come with detailed assembly instructions and schematics, making them accessible to a wide range of skill levels. Additionally, many kits allow for customization, enabling users to choose specific components, such as transistors and capacitors, which can alter the sound quality and performance of the amplifier. This flexibility is a significant advantage for audiophiles looking to tailor their audio systems to their personal preferences.
In terms of relevance, kit amplifiers serve as a cost-effective alternative to pre-assembled amplifiers. They often provide superior sound quality at a lower price point, especially when compared to commercial models that may use similar components. For instance, a well-assembled kit amplifier can outperform a more expensive brand-name amplifier, making them an attractive option for budget-conscious audio enthusiasts. Statistics indicate that the DIY audio market has seen a resurgence, with a growing number of individuals seeking personalized audio solutions.
The impact of kit amplifiers extends beyond mere audio quality; they foster a sense of community among users who share tips, modifications, and experiences online. Forums and social media groups dedicated to DIY audio projects are thriving, offering a platform for collaboration and innovation. Moreover, the skills acquired in building kit amplifiers can lead to further interests in electronics, potentially inspiring individuals to pursue careers in engineering or related fields.
Best practices for assembling a kit amplifier include carefully reading the instructions provided, organizing components before starting the assembly process, and using quality tools to ensure a professional finish. Additionally, seeking advice from experienced builders and participating in online communities can enhance the building experience. Ultimately, the journey of constructing a kit amplifier not only results in a functional audio device but also enriches the builder’s understanding of audio technology and electronics.
What Are the Benefits of Using a Kit Amplifier for Music Enthusiasts?
The benefits of using a kit amplifier for music enthusiasts include affordability, customization, and improved sound quality.
- Affordability: Kit amplifiers are often more cost-effective compared to pre-assembled models. They provide an opportunity for audiophiles on a budget to achieve high-quality sound without breaking the bank.
- Customization: Building a kit amplifier allows users to select components that best match their preferences and needs. This level of personalization can lead to a unique sound profile tailored specifically to the listener’s taste.
- Learning Experience: Assembling a kit amplifier offers hands-on experience with electronics, enhancing one’s understanding of audio equipment. This educational aspect can be particularly rewarding for those interested in the technical side of music production.
- Quality Sound: Many kit amplifiers are designed with high-quality components, which can lead to superior audio performance. Enthusiasts often find that these kits provide clearer sound and better fidelity compared to lower-end commercial amplifiers.
- Community Support: The kit building community is robust, with forums and groups dedicated to helping enthusiasts troubleshoot and enhance their builds. This camaraderie not only fosters a sense of belonging but also provides access to a wealth of knowledge and resources.
What Key Features Should You Look For in the Best Kit Amplifier?
When searching for the best kit amplifier, several key features can significantly influence your choice.
- Power Output: Look for amplifiers with adequate power output that matches your speakers’ requirements. A higher wattage ensures that the amplifier can drive the speakers effectively without distortion, providing a fuller sound experience.
- Build Quality: The materials used in the construction of the amplifier play a crucial role in its durability and performance. A well-built amplifier often has better heat dissipation, enhancing its longevity and reliability during extended use.
- Ease of Assembly: For kit amplifiers, consider how straightforward the assembly process is. User-friendly kits often come with clear instructions and well-marked components, making it easier for even beginners to put together a functional unit.
- Sound Quality: Evaluate the audio performance criteria such as frequency response and total harmonic distortion (THD). A good kit amplifier should deliver clear, balanced sound across all frequencies without noticeable distortion at higher volumes.
- Connectivity Options: Check for a variety of input and output options, such as RCA, Bluetooth, or USB ports. The versatility in connectivity allows you to integrate the amplifier with different audio sources, enhancing its usability in various setups.
- Size and Form Factor: The physical dimensions of the amplifier are important, especially if space is a concern. Compact designs can fit into tighter spaces while still providing excellent performance, making them ideal for home audio setups.
- Price and Value: Assess the price in relation to the features offered. A higher price point may be justified by superior components or additional features, making it essential to weigh the cost against the overall value it provides.
Why Is Power Output Critical When Selecting a Kit Amplifier?
According to the Consumer Electronics Association, an amplifier’s power output is measured in watts, and this metric is essential for matching the amplifier to the speakers and the intended listening environment. Insufficient power can lead to distortion at higher volumes, while excessive power can damage speakers, making it crucial for users to consider their specific needs and equipment compatibility when choosing the best kit amplifier.
The underlying mechanism involves the relationship between voltage, current, and speaker impedance. An amplifier must provide enough voltage and current to drive the speaker cones effectively, allowing for accurate reproduction of sound waves. When an amplifier operates within its optimal power range, it can produce a clean signal with minimal distortion, delivering a better listening experience. Conversely, if the amplifier’s power output is too low for the connected speakers, it may lead to clipping, where the signal is distorted, negatively affecting sound fidelity. On the other hand, an amplifier that exceeds the speaker’s power handling capabilities can result in overheating and potential damage, highlighting the importance of selecting an amplifier that balances power output with speaker specifications.
How Does Build Quality Impact the Performance of a Kit Amplifier?
The build quality significantly influences the performance of a kit amplifier in various ways, including durability, sound quality, and thermal management.
- Material Quality: The materials used in the construction of a kit amplifier can greatly affect its overall performance. High-quality components, such as capacitors, resistors, and circuit boards, contribute to better sound fidelity and reliability, ensuring that the amplifier can handle various audio frequencies without distortion.
- Circuit Design: A well-thought-out circuit design is critical for optimal performance. Amplifiers that are designed with attention to signal paths and grounding techniques minimize interference and enhance audio clarity, making a noticeable difference in sound output.
- Cooling Mechanisms: Effective thermal management is essential for maintaining performance, particularly during extended use. Amplifiers that incorporate adequate heat sinks or ventilation designs can prevent overheating, which might otherwise lead to reduced efficiency, distortion, or even component failure.
- Assembly Precision: The precision of assembly impacts the overall reliability and functionality of a kit amplifier. Kits that are assembled with high attention to detail, including proper soldering and connection integrity, ensure stable operation and longevity.
- Chassis Construction: The chassis of a kit amplifier plays a key role in protecting internal components and reducing vibration. A sturdy, well-designed chassis can dampen unwanted noise and resonance, leading to clearer sound reproduction and a more enjoyable listening experience.
Which Brands Are Recognized for Producing High-Quality Kit Amplifiers?
The main brands recognized for producing high-quality kit amplifiers include:
- Dayton Audio: Known for their affordable yet high-performance audio products, Dayton Audio offers a range of kit amplifiers that are popular among DIY audiophiles.
- TPA: TPA specializes in Class D amplifier kits, which are efficient and compact, making them ideal for hobbyists looking to build their own high-quality audio systems.
- Hypex: Hypex is renowned for its innovative Ncore technology, providing exceptional sound quality in their amplifier kits, often used by audiophiles and professionals alike.
- Audio Nirvana: This brand focuses on high-fidelity audio components, offering tube amplifier kits that appeal to those who appreciate warm, rich sound characteristics.
- Sure Electronics: Sure Electronics is a versatile brand that produces a variety of amplifier kits, including both Class D and Class AB options, catering to a wide range of audio needs.
Dayton Audio: Their kit amplifiers are designed to deliver impressive sound quality at a budget-friendly price, making them a go-to choice for many audio enthusiasts. They often come with clear instructions and are praised for their ease of assembly, which is ideal for beginners.
TPA: TPA kits are known for their compact size and efficiency, utilizing Class D technology that allows for high power output with minimal heat generation. Their products are often favored in portable audio applications and small home setups.
Hypex: Hypex amplifiers are recognized for their sophisticated design and high performance, often incorporating advanced digital signal processing. The Ncore technology they use has become a benchmark in the industry for delivering clean, dynamic sound reproduction.
Audio Nirvana: This brand’s tube amplifier kits provide a unique sound signature that many audiophiles find appealing. They cater to those who appreciate the nuances of analog sound and are often sought after for their vintage aesthetic and warm tonal qualities.
Sure Electronics: Offering a diverse range of amplifier kits, Sure Electronics allows users to choose between different amplification classes to suit their specific needs. Their products are well-regarded for their reliability and performance, making them a solid choice for DIY projects.
What Common Challenges Might You Face When Assembling a Kit Amplifier?
- Complex Instructions: Many kit amplifiers come with detailed manuals that can be difficult to follow, especially for beginners. Misinterpretations of assembly steps can lead to incorrect wiring or component placement, resulting in malfunctioning units.
- Component Identification: Identifying and organizing numerous electronic components can be challenging. If components are not correctly sorted or labeled, it can lead to confusion and mistakes during assembly, making the process more time-consuming.
- Soldering Skills: Proficiency in soldering is crucial for a successful assembly. Poor soldering techniques can result in weak connections or shorts between components, which may lead to performance issues or even damage to the amplifier.
- Testing and Troubleshooting: After assembly, testing the amplifier is essential to ensure it functions correctly. Diagnosing issues can be daunting, especially if the builder lacks experience in electronic troubleshooting, leading to frustration and prolonged repair times.
- Heat Management: Kit amplifiers can generate significant heat, and inadequate heat dissipation can lead to component failure. Proper planning for heat sinks and ventilation is essential to ensure longevity and reliability of the amplifier.
- Power Supply Compatibility: Ensuring that the correct power supply is used can be a common challenge. Using an incompatible power source can damage components and affect performance, so it’s crucial to verify specifications before connecting the amplifier to power.
- Space Constraints: Many kits are designed to fit within a limited space, which can make assembly tricky. Navigating tight areas without damaging components or wires can be challenging and may require careful planning and execution.
How Can You Overcome Assembly Challenges for a Successful Build?
Overcoming assembly challenges for a successful build involves careful planning and execution.
- Choosing the Right Kit: Selecting a high-quality kit amplifier is crucial for a successful assembly. Researching reviews and specifications will help you find kits that are well-regarded for their ease of assembly and performance.
- Preparation of Tools and Space: Having the right tools on hand, such as soldering irons, multimeters, and screwdrivers, as well as a clean, organized workspace, can significantly reduce assembly difficulties. A clutter-free environment allows you to focus on the task without distractions and reduces the risk of losing small components.
- Following Instructions Carefully: Most kit amplifiers come with detailed assembly instructions. It’s essential to read these thoroughly before starting and to follow each step methodically to avoid mistakes that could lead to functionality issues.
- Pre-Assembly Testing: Testing components before assembly can identify any defective parts early on, preventing frustration later in the process. This practice includes measuring resistance, capacitance, and ensuring all parts are in good condition prior to soldering them onto the board.
- Seeking Community Support: Engaging with online forums or local electronics clubs can provide valuable insights and troubleshooting tips from others who have built similar kits. Sharing experiences and solutions can help you navigate common assembly challenges effectively.
- Patience and Persistence: Assembly can sometimes take longer than anticipated, and encountering problems is common. Maintaining a patient attitude and being willing to troubleshoot will not only improve your skills but also enhance your overall building experience.
What Tips Can Enhance Your Experience with a Kit Amplifier?
To enhance your experience with a kit amplifier, consider the following tips:
- Choose the Right Kit: Selecting a kit amplifier that matches your skill level and intended use is crucial. Beginners may prefer simpler kits with clear instructions, while more experienced users might enjoy the challenge of complex builds that offer advanced features.
- Quality Components: Invest in high-quality components when building your kit amplifier, as this can significantly affect sound quality and longevity. Premium capacitors, resistors, and connectors can enhance the overall performance and reliability of your amplifier.
- Proper Tools: Ensure you have the right tools for assembly, including a soldering iron, multimeter, and wire strippers. Having the appropriate tools will make the building process smoother and help you avoid mistakes that could lead to poor performance.
- Follow Instructions Carefully: Carefully read and follow the assembly instructions provided with your kit. Taking your time to ensure each step is completed correctly will lead to a better functioning amplifier and reduce the risk of damage.
- Test Before Final Assembly: It’s advisable to test individual sections of the circuit before final assembly. This step will allow you to troubleshoot any issues early on, ensuring that the final product works properly.
- Consider Upgrades: Research possible upgrades for your kit amplifier, such as improved cooling systems or upgraded power supplies. These enhancements can boost the performance and reliability of your amplifier, providing a better listening experience.
- Placement and Environment: Pay attention to where you place your amplifier, as proper ventilation and a stable surface can prevent overheating and vibrations. Additionally, avoiding proximity to other electronic devices can minimize interference and improve sound clarity.
- Fine-Tuning Settings: Spend time adjusting settings like gain, bass, and treble to match your audio preferences. Fine-tuning these settings allows you to personalize your listening experience and optimize the sound output for different genres of music.