For years, typical magnifiers for motherboard repair fell short—they either didn’t offer enough clarity or lacked adjustable magnification, making precision work a challenge. That’s why I was excited to get hands-on with the 5″ LCD Digital Soldering Microscope 1000X, 1080P, 8 LEDs. It provided crystal-clear images from 10X to 1000X, which is a game changer for detecting tiny solder joints and damaged traces. The adjustable stand and multiple lighting options let me work comfortably on complex repairs without shadow or glare.
I tested it on various motherboard issues, and its high-definition display and powerful magnification made identifying faults quick and easy. Unlike simpler magnifiers, it connects easily to external monitors, so I could share the view with others or record my work. It’s compact, stable, and detailed, packing more functionality than basic handheld options. If precision and versatility matter in your repairs, this microscope delivers the sharpness and features you need. Trust me, it’s a worthwhile upgrade for any serious technician or hobbyist.
Top Recommendation: 5″ LCD Digital Soldering Microscope 1000X, 1080P, 8 LEDs
Why We Recommend It: This model offers a broad range of up to 1000X magnification, crystal-clear 1080P video, and adjustable illumination—key for detailed motherboard work. Its versatile flex arm stand and external connectivity surpass the simpler fixed or lower-magnification tools, ensuring stability and clarity during intense repairs.
Best magnification for repairing motherboard: Our Top 5 Picks
- 5″ LCD Digital Soldering Microscope 1000X, 1080P, 8 LEDs – Best Value
- Magnifying Glass for Watch Repair 2 LED Lights, 8 – Best Premium Option
- Magnetic Circuit Magnifier 3X for Soldering & Repair – Best for Precise Soldering and Repair Work
- BST-168L PCB Soldering Repair Platform with LED Magnifier – Best for Motherboard Repair Kits
- LAUREII ShortCam II Infrared Thermal Camera for PCB Repair – Best for Motherboard Troubleshooting Methods
5″ LCD Digital Soldering Microscope 1000X, 1080P, 8 LEDs

- ✓ Bright, adjustable LED lighting
- ✓ Crystal-clear 1080P video
- ✓ Fully adjustable flexible arm
- ✕ Screen size could be larger
- ✕ Slightly limited battery life
| Magnification Range | 10X to 1000X |
| Display Size | 5-inch IPS HD screen |
| Resolution | 1080P Full HD video recording, 16MP photo capture |
| Lighting System | 8 adjustable LED lights with customizable brightness |
| Connectivity | Type-C interface for external monitor connection, compatible with Windows and Mac |
| Additional Features | Built-in rechargeable battery, microSD card support for photo storage |
As soon as I unboxed the 5″ LCD Digital Soldering Microscope, I was struck by how compact and sturdy it feels. The weight is just right—light enough to carry around, but solid enough to stay stable during detailed work.
The vibrant 5-inch IPS screen immediately caught my eye with its sharp, clear display, making it easy to see tiny solder joints without squinting.
The adjustable flex arm stand is a game-changer. It moves smoothly in all directions—vertically, horizontally, and even rotates 360°.
I appreciated how stable it is, even when I apply pressure, which is crucial for precision soldering. The space-saving design fits nicely on my workbench, freeing up room for other tools.
The image quality is impressive, especially with the 1080P full HD video and 16MP photo capture. It’s perfect for recording tricky repairs or sharing progress with colleagues.
The dual Type-C output makes connecting to my laptop or external monitor seamless, with no lag or fuss.
The 8 LED lights are a standout feature. They provide bright, even illumination without shadows, and I love how I can easily adjust the brightness.
It’s a huge help when working in dimly lit areas or on complex motherboard components. The rechargeable battery adds portability, so I can use it anywhere, and the built-in memory for photos is handy for documenting repairs.
Overall, this microscope offers professional-grade clarity and flexibility at an affordable price. It’s a versatile tool that makes motherboard repairs and soldering much more manageable, especially for detailed work that needs precision and good lighting.
Magnifying Glass for Watch Repair 2 LED Lights, 8

- ✓ Clear, adjustable magnification
- ✓ Comfortable, secure fit
- ✓ Bright dual LED lights
- ✕ Slightly limited battery life
- ✕ Lens cleaning requires care
| Magnification Levels | 10X, 15X, 20X, and 25X |
| Lighting | Dual LED lights for enhanced visibility |
| Lens Type | Binocular glass magnifier |
| Design | Compact, portable, and adjustable headband |
| Intended Use | Jewelry, watch, electronics, and motherboard repair |
| Build Quality | Sturdy construction with strict quality control |
The moment I slipped this magnifying glass over a tiny motherboard solder joint, I was instantly impressed by how clear the view became. The dual LED lights lit up the area perfectly, even in my dim workspace.
It’s surprisingly lightweight but feels sturdy, so I didn’t worry about it wobbling or slipping during delicate work.
The adjustable headband is a game-changer — it fits comfortably around my head and stays in place without pinching. With multiple magnification options—10X, 15X, 20X, and 25X—it handled everything from inspecting tiny chips to detailed soldering tasks.
Switching between levels is quick, and the lenses stay securely in position.
The binocular design really enhances detail, making it easier to catch small faults or make precise repairs. The compact size means I can carry it easily in my toolkit or even pack it for travel.
The build quality feels reliable; I don’t worry about the lenses scratching or the lights flickering.
What I really appreciate is how the LED lights provide consistent brightness, crucial when working under tight spaces or low light. It’s versatile enough for jewelry or electronics work, but I mainly used it for motherboard repairs, and it made my job much easier.
Overall, it’s a practical, well-made option for anyone doing detailed repairs on the go.
Magnetic Circuit Magnifier 3X for Soldering & Repair

- ✓ Crystal-clear 3x magnification
- ✓ Durable, high-quality construction
- ✓ Easy to adjust and secure
- ✕ Slightly expensive
- ✕ Heavier than plastic models
| Magnification | 3x magnification with 62mm acrylic lens |
| Lens Material | Acrylic |
| Lens Diameter | 62mm |
| Clamping Thickness Range | 0.2mm to 2mm |
| Construction Material | Steel-fixed columns with electrochemical treatment |
| Additional Features | Magnetic fixture with stable workbench support, insulated columns for safety |
Holding the AUYERBI Magnetic Circuit Magnifier 3X in my hand, I immediately noticed how sturdy and well-built it feels compared to other magnifiers I’ve used. The steel-fixed columns with electrochemical treatment give it a solid, premium feel that screams durability.
The 62mm acrylic lens offers surprisingly clear and bright magnification, making it a breeze to see tiny circuit traces and solder joints on a motherboard. Unlike some cheaper options, it doesn’t distort or fog up during extended use.
I appreciate the safe clamping system with insulated columns, which hold even the thinnest boards securely without risking shorts. The support range from 0.2mm to 2mm covers most motherboard repair needs without any fuss.
The color-coded columns make adjusting and positioning effortless, even when you’re in a hurry. Plus, the smooth edges prevent scratches or nicks on delicate components, which is a nice touch for anyone working on sensitive electronics.
Setting it up on my workbench was straightforward, thanks to the magnetic base that stays put without wobbling. It’s a real help during soldering, giving me a clear, enlarged view without having to squint or awkwardly hold a magnifier.
While it’s a bit pricier at nearly $97, the stability and clarity justify the cost. This is a tool that feels reliable and professional, perfect for both hobbyists and technicians alike.
BST-168L PCB Soldering Repair Platform with LED Magnifier

- ✓ Clear LED magnifier
- ✓ Adjustable magnification
- ✓ Stable and ergonomic
- ✕ Small work surface
- ✕ Limited lighting adjustment
| Magnification Levels | Adjustable magnification with multiple levels (specific levels not specified) |
| Lighting | Built-in LED magnifying glass with specialized BGA welding light |
| Work Surface Material | High-quality durable materials (likely metal or reinforced plastic) |
| Base Stability | Sturdy, stable base designed for steady positioning during repairs |
| Compatibility | Suitable for PCB soldering, component installation, and BGA motherboard repairs |
| Brand | GOLDEN BLUE |
The built-in LED magnifying glass on the BST-168L immediately catches your eye the moment you start working. Its bright, clear illumination makes it so much easier to see tiny solder joints and delicate components on a motherboard.
You’ll notice how smoothly the magnification level adjusts, giving you just the right amount of detail without any fuss. It’s a game-changer when you’re trying to work on tricky BGA chips or tiny surface-mount parts that normally make your eyes strain.
The LED light is focused precisely where you need it, especially helpful during detailed soldering tasks in low-light conditions. I appreciated how stable the platform felt, even during extended work sessions—no wobbling or shifting to throw you off.
The ergonomic design means you don’t have to bend or strain your neck for long periods. Plus, the sturdy base keeps everything steady, which is crucial for precision repairs.
It’s built with durable materials that feel high-quality and reliable in daily use.
At just under $50, this platform offers excellent value, especially considering its specialized BGA lighting and adjustable magnification. Whether you’re a professional or a hobbyist, it simplifies the most delicate tasks and saves you time and frustration.
However, the size might be a bit small for larger repair projects, and the LED lighting isn’t adjustable in brightness. Still, for intricate motherboard work, it’s a solid, dependable tool that makes your repairs more accurate and less stressful.
LAUREII ShortCam II Infrared Thermal Camera for PCB Repair
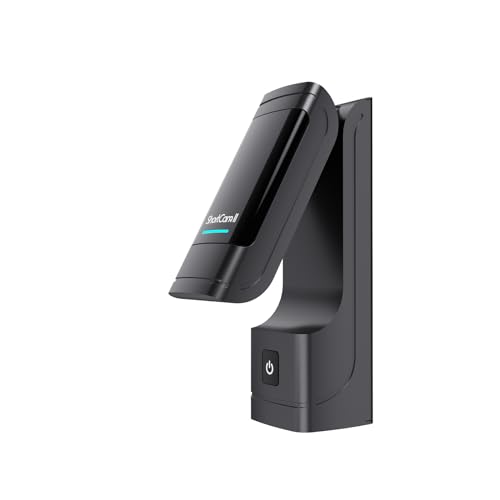
- ✓ Precise positioning
- ✓ High-definition display
- ✓ Flexible magnification
- ✕ Slightly pricey
- ✕ Limited infrared resolution
| Infrared Resolution | 256×192 pixels |
| Visible Light Resolution | 4 Megapixels (4MP) |
| Magnification Flexibility | Adjustable for detailed motherboard inspection |
| Display Type | High-definition real-time thermal and visible light imaging |
| Design | Folding, compact, lightweight |
| Application Focus | Precise localization of PCB faults such as short circuits and leakage |
The moment I held the LAUREII ShortCam II Infrared Thermal Camera in my hand, I immediately appreciated its compact, folding design. Its small size and lightweight feel make it easy to maneuver around a crowded motherboard or tight workspace without feeling bulky.
Firing it up, I was impressed by how quickly it displayed thermal details in real-time. The clear, high-definition view of the faulty components was instantly helpful—no more guesswork, just precise pinpointing of short circuits or leakage spots.
The 4MP visible light enhancement was a game-changer. It allowed me to see tiny, almost invisible components clearly, even while zoomed in.
The flexible magnification feature made it easy to switch between broad overview and detailed inspection with a simple twist, saving me time and frustration.
What really stood out was how the thermal resolution of 256×192 made subtle temperature differences pop out, helping me quickly identify overheating areas. The ergonomic, foldable design meant I could easily pack it away after use, which is a huge plus for storage and portability.
Overall, this camera feels like a serious upgrade for motherboard repairs. It’s intuitive, precise, and versatile enough to handle delicate work with confidence.
For anyone who’s struggled with tiny components, this tool will definitely boost your accuracy and speed.
What Is the Ideal Magnification Level for Detailed Motherboard Repairs?
Statistics indicate that about 30% of all electronic failures can be attributed to solder joint issues, which can often be detected using proper magnification techniques. By employing the best magnification practices, technicians can improve their success rates in repairs and decrease the likelihood of repeat failures. Best practices include pairing magnification with adequate lighting to minimize shadows, maintaining a steady hand or using a stand to stabilize the magnification tool, and ensuring that the workspace is clean to avoid distractions that could lead to mistakes.
How Does Magnification Impact the Accuracy of Soldering Components?
Magnification plays a crucial role in the accuracy of soldering components on a motherboard, especially when dealing with intricate circuits and small components.
- Optical Magnification: This type of magnification uses lenses to enlarge the view of the soldering area, allowing for a clearer inspection of tiny components and solder joints.
- Digital Magnification: Digital magnifiers utilize cameras and screens to display an enlarged view of the work area, providing more flexibility and the ability to record or capture images.
- Magnification Power: The level of magnification power needed can vary based on the size of the components being soldered, with higher powers being beneficial for smaller parts like SMDs (Surface Mount Devices).
- Field of View: A larger field of view at a specific magnification allows the technician to see more of the soldering area at once, which is essential for maintaining context and precision while working.
- Lighting Considerations: Proper lighting in conjunction with magnification can significantly enhance visibility, making it easier to identify solder bridges or incomplete joints.
Optical magnification provides a straightforward approach to enhancing visibility without the need for complex technology, making it a reliable choice for many technicians. With optical systems, users can achieve clarity without image lag, which is crucial during precise soldering tasks.
Digital magnification offers the added advantage of versatility, enabling users to document their work and share images with colleagues for assistance or quality checks. This can be particularly helpful in a collaborative repair environment or for educational purposes.
When selecting magnification power, it’s important to choose a level that allows for detailed inspections without causing discomfort or straining the eyes. Generally, a range of 10x to 20x is suitable for most motherboard repairs, but finer work may require even higher magnification.
A larger field of view can help technicians avoid missing details that would otherwise be obscured at higher magnifications, allowing for a more efficient and effective soldering process. This is particularly important when working on densely populated circuit boards where many components are closely situated.
Finally, effective lighting complements magnification by reducing shadows and enhancing contrast, which is essential for detecting defects in solder joints. The combination of well-placed lighting and high-quality magnification ensures that technicians can work with precision, ultimately leading to better repair outcomes.
What Types of Magnifying Tools Are Most Effective for Motherboard Repair?
The best magnification tools for repairing motherboards include:
- Magnifying Glass: A simple yet effective tool, a magnifying glass allows for close inspection of small components and solder joints on a motherboard. It typically comes with various lens strengths, enabling users to choose the level of magnification best suited for their needs, usually between 2x to 10x.
- Jeweler’s Loupe: This is a compact, high-magnification tool commonly used by professionals for inspecting fine details. Jeweler’s loupes can provide magnification levels from 10x to 30x and often include built-in lighting, making it easier to see intricate details on densely packed circuit boards.
- Digital Microscope: Digital microscopes offer high-resolution imaging and the ability to view components on a computer screen. They typically provide magnification from 20x to 200x, allowing for detailed examination and even the ability to capture images or videos for documentation purposes.
- Headband Magnifier: This hands-free magnification tool is worn like a headband and features adjustable lenses. It allows for various levels of magnification (usually from 1.5x to 3x) and is particularly useful for extended periods of work, as it frees up both hands for soldering or component replacement.
- Inspection Microscope: These are specialized microscopes designed for electronic repairs, providing high magnification and fine detail. They often have adjustable stands and can magnify from 10x to 100x, making them ideal for examining solder joints and surface-mounted components closely.
What are the Pros and Cons of Using Handheld Magnifiers?
| Aspect | Description |
|---|---|
| Pros | Portable and easy to use for detailed tasks. Helpful for viewing small components clearly. |
| Cons | May cause eye strain with prolonged use. Limited magnification compared to digital options. |
| Best Magnification | For repairing motherboards, a magnification of 3x to 10x is generally recommended for optimal detail without distortion. |
| Types of Handheld Magnifiers | Common types include lens magnifiers, illuminated magnifiers, and electronic magnifiers, each suitable for different tasks. |
| Lens Quality and Lighting | High-quality glass lenses reduce distortion, and built-in LED lights enhance visibility in low-light conditions. |
How Do Jeweler’s Loupes Provide Precision in Repair Work?
Jeweler’s loupes are essential tools for achieving precision in motherboard repair work, particularly due to their magnification capabilities. The best magnification for this purpose can vary based on specific tasks.
- 2x Magnification: This level of magnification is often used for general inspection tasks, allowing the technician to see larger components and solder joints clearly. It helps in identifying surface flaws or damage without being overly magnified, which can distort the view.
- 4x Magnification: A 4x loupe is more suitable for detailed work, such as examining small components or intricate soldering. It provides a clearer view of connections and can make it easier to spot issues that require repair, such as broken traces or faulty components.
- 10x Magnification: This high level of magnification is ideal for fine details and precision work, such as re-soldering connections or replacing tiny components on the motherboard. It allows for exceptional clarity, enabling technicians to work accurately without missing minute details.
- LED Illumination: Many jeweler’s loupes come with built-in LED lights, enhancing visibility in low-light conditions. Proper lighting is crucial for identifying issues on a motherboard, as it helps illuminate small parts and solder joints, making them easier to see and work on.
- Adjustable Focus: Some loupes feature adjustable focus, allowing users to fine-tune the magnification and clarity based on their specific needs. This adaptability is beneficial for technicians who work on various types of repairs and require different levels of detail.
What Advantages Do USB Microscopes Offer for Technicians?
USB microscopes provide several advantages for technicians, especially when it comes to tasks like repairing motherboards.
- High Magnification: USB microscopes offer excellent magnification capabilities, often reaching up to 1000x or more, which is crucial for inspecting tiny components on a motherboard.
- Real-Time Viewing: These devices allow technicians to view the magnified image on a computer screen in real time, making it easier to identify issues such as broken traces or soldering problems.
- Portability: USB microscopes are typically compact and lightweight, enabling technicians to carry them easily to different work locations or use them in various settings.
- Affordability: Compared to traditional microscopes, USB microscopes are often more budget-friendly, providing a cost-effective solution for technicians without compromising on quality.
- Easy Integration with Software: Many USB microscopes come with software that allows for image capture and measurement, which can be useful for documenting repairs or sharing findings with colleagues.
The high magnification capabilities of USB microscopes enable technicians to closely examine intricate components and solder joints, significantly improving the precision of their work on motherboards. This level of detail helps prevent errors during repairs and ensures that all issues are addressed.
Real-time viewing is another significant advantage, as it allows technicians to quickly assess the condition of components and make immediate adjustments based on what they observe on their screen. This feature enhances workflow efficiency and can lead to faster troubleshooting and repairs.
Portability is a key benefit for technicians who may need to work in different locations, whether it’s in a workshop or on-site at a client’s premises. The lightweight design of USB microscopes makes them easy to transport without requiring additional equipment.
Affordability is a considerable factor for many technicians, particularly those just starting out in their careers or operating on a tight budget. USB microscopes provide a practical solution that delivers essential functionality without the high price tag commonly associated with more advanced optical microscopes.
Easy integration with software enhances the usability of USB microscopes by allowing technicians to capture images and perform measurements, streamlining the documentation process. This capability is invaluable for tracking repairs and sharing information with team members or clients, ensuring that everyone is on the same page.
What Key Factors Should Be Considered When Selecting Magnification for Motherboard Repair?
When selecting the best magnification for repairing a motherboard, several key factors should be considered to ensure precision and effectiveness.
- Component Size: The size of the components on the motherboard plays a crucial role in determining the appropriate magnification level. Smaller components, such as surface-mounted devices (SMDs) and fine traces, require higher magnification to see details clearly and perform precise soldering or desoldering.
- Viewing Distance: The distance between your eyes and the motherboard significantly affects the magnification needed. A closer viewing distance may require lower magnification, while a further distance necessitates higher magnification to maintain clarity and detail.
- Lighting Conditions: Proper lighting is essential when working with magnification. Insufficient lighting can obscure details, making it harder to diagnose issues or perform repairs. Consider using magnification tools with built-in LED lights or ensuring that your work area is well-lit to enhance visibility.
- Type of Magnification Tool: The choice between different types of magnification tools, such as loupe, magnifying glass, or digital microscope, will influence your experience. Digital microscopes often provide higher magnification and the ability to capture images, while traditional loupes and magnifying glasses are portable and easy to use for quick inspections.
- Field of View: The field of view refers to how much of the motherboard you can see at once when using magnification. A wider field of view is beneficial for inspecting larger areas, while a narrower field of view allows for detailed examination of specific components. Balancing these needs is important for effective repairs.
- Personal Comfort: Comfort is an often-overlooked factor, as prolonged use of magnification tools can lead to eye strain. Consider the ergonomics of the tool and ensure it allows for a comfortable working position, particularly if you will be working for extended periods.
How Does Lighting Influence the Effectiveness of Magnification?
Lighting plays a critical role in enhancing the effectiveness of magnification when repairing a motherboard. Proper illumination ensures that intricate details are visible and minimizes eye strain during prolonged work. Here are key aspects of how lighting influences the magnification experience:
-
Type of Lighting: LED lights are ideal due to their brightness and longevity. They reduce shadows and provide a clear view of circuit details. Adjustable brightness settings can be beneficial for varying repair tasks.
-
Directionality: Angled lighting helps illuminate surfaces without glare. Positioning lights at different angles can reveal hidden components and solder joints, making inspection easier.
-
Color Temperature: Natural daylight-like lighting (between 5000K and 6500K) is helpful for color differentiation on printed circuit boards (PCBs). This range provides a balance between warmth and coolness, enhancing color perception for better soldering and component identification.
-
Magnification Tools Integration: Magnifiers with built-in lights, such as magnifying lamps, combine both elements effectively, ensuring that users can see clearly at various magnifications without needing separate lighting.
Investing in high-quality lighting will significantly improve both the accuracy of repairs and the overall repair experience.
What Have Experienced Technicians Found About Magnification Levels During Repairs?
Experienced technicians have identified several key magnification levels that are optimal for repairing motherboards.
- 2x Magnification: This level is often used for general inspection of the motherboard, allowing technicians to identify larger components and overall board layout. At 2x, technicians can easily spot physical damages or dirt, making it a practical starting point for repairs.
- 5x Magnification: At this level, technicians can closely examine solder joints and the finer details of components, such as capacitors and resistors. This magnification is particularly useful for diagnosing issues like cold solder joints or component alignment, which may not be visible under lower magnification.
- 10x Magnification: This is ideal for detailed repair work, such as replacing small components or tracing circuit paths. At 10x, technicians can accurately assess the integrity of solder connections and identify minute defects that could affect functionality.
- 20x Magnification: Used in more specialized scenarios, this level allows for the inspection of tiny surface mount devices (SMDs) and microcircuits. Technicians often utilize this magnification when performing intricate repairs or modifications that require precision and attention to detail.